Pipeline Tools for Just Cause 4
17 Oct 2018 #Tool #Maya #PortfolioAnimation Support Tools for Just Cause 4
While working on Just Cause 4, I had the opportunity to make additions and updates to Avalanche’s internal animation tools. These tools ranged from essential pipeline improvements as well as quality of life improvement for the animators.
Animation Toolbar
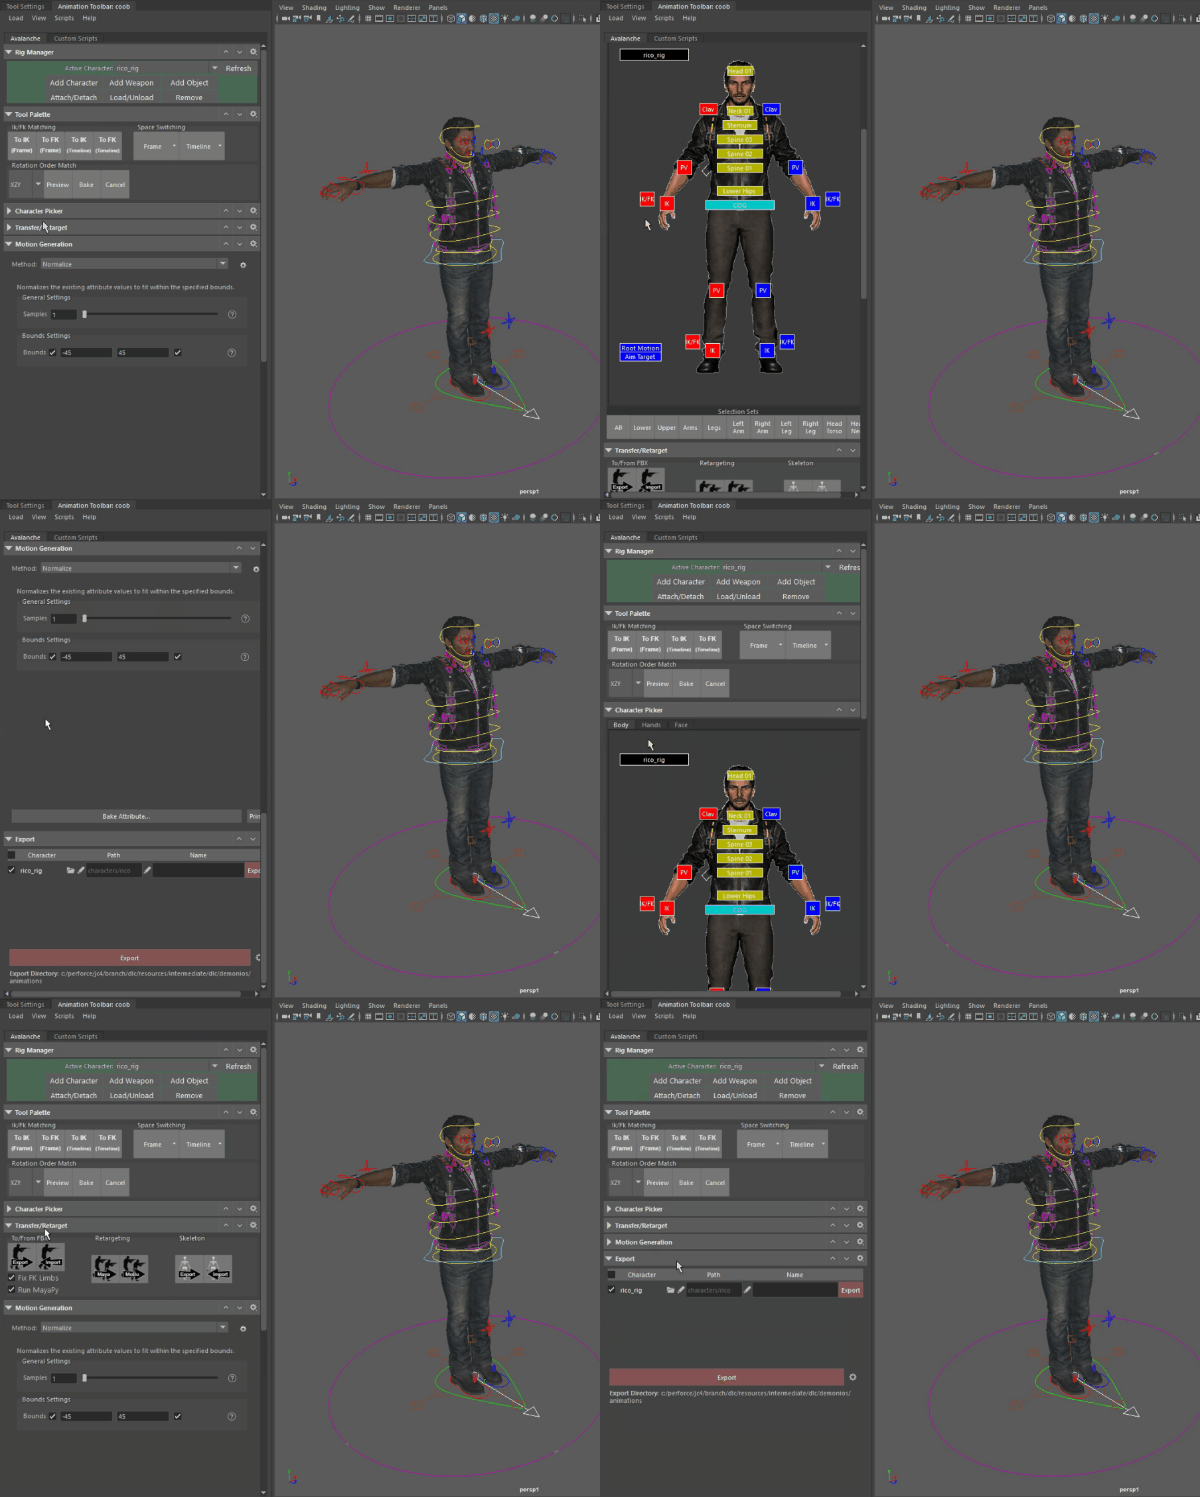 The animation toolbar is the central hub for all of our custom tools. I had the opportunity to do a full refactor of the ui design and code. While much of the functionality was preserved, the interface above is totally new.
Additionally I ported these tools to Maya 2017. Maya 2017 included significant UI changes which required a refactor as well as a totally new docking implementation. The final result is fully integrated with Maya’s workspace control.
Exporter
 As we use a custom engine, all animations must be exported to Avalanche’s proprietary format. While this export process was already established, the interface above is entirely new. I also had the opportunity to update our interface to support some new features:
- Exporting in the background
- Auto updating in engine via Avalanche’s “Dropzone” system
- Multiple character support
- Auto-saving export setting in the scene
Motion Generation Tools
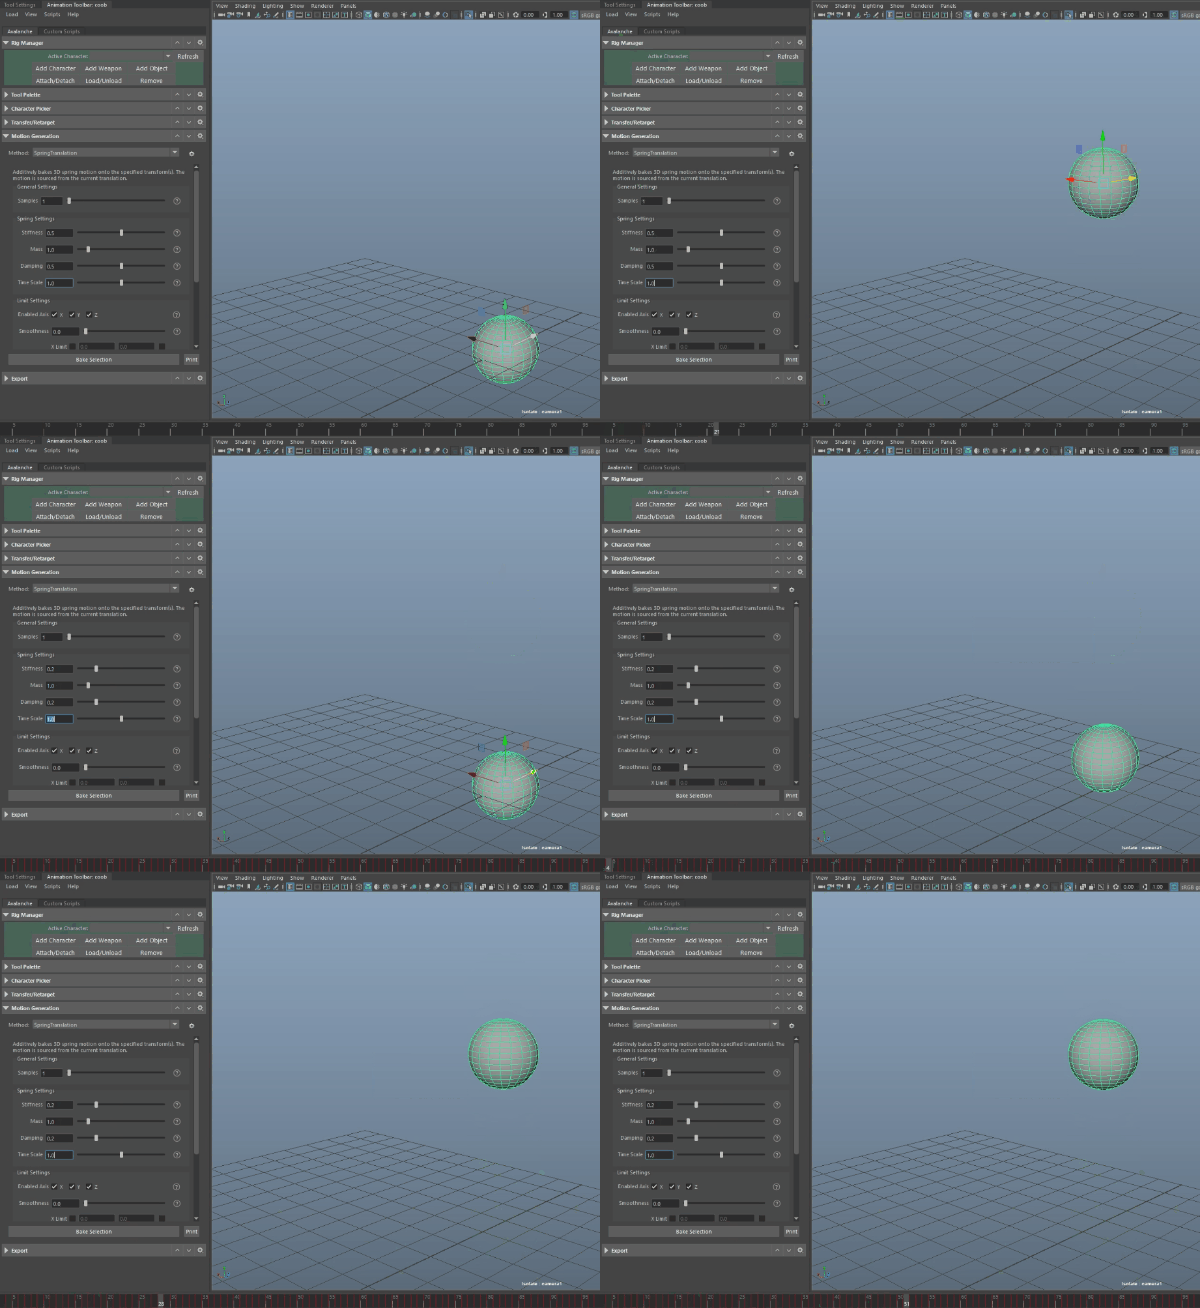
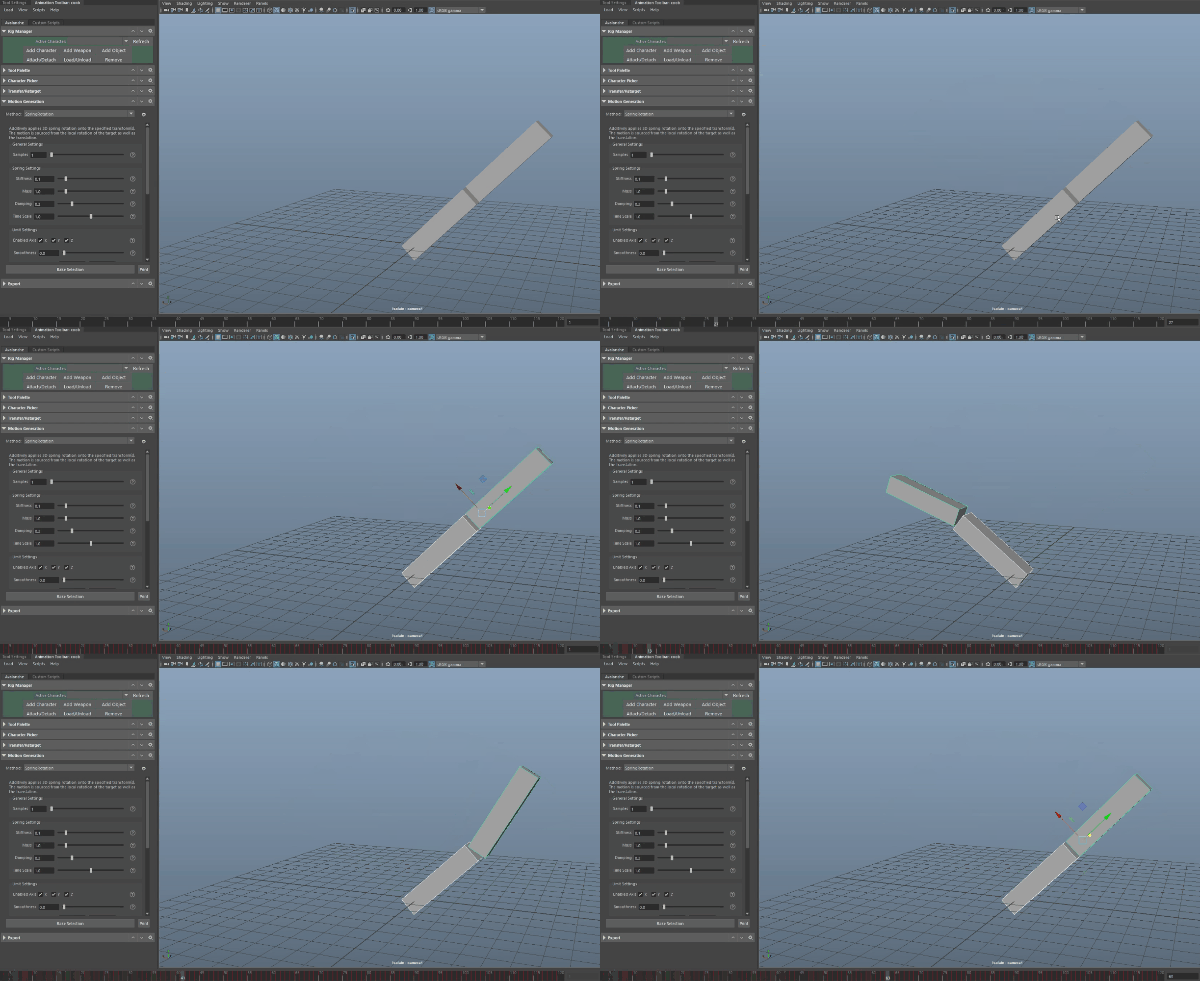 One completely new addition I added was a set of motion generation tools. The main goal was to be able to auto-generate secondary motion for our cinematic characters. However I also built it as a polished tool available for animators to use.
While tool is a fairly common one, the unique feature here was that it used custom physics solving rather that Maya’s native solver. Essentially I built a fairly simple physics engine that runs over the scene and bakes the results. Since physics did not need to be calculated in the scene, the result was very fast, and was not limited to what features exist in Maya.
Another unique features is the inclusion of normalized limits. Compared to normal clamping, this filter does not merely cut off motion past a point, but instead normalizes it to fit within the limits.
This was helpful in preventing undesirable limit behavior due to very quick motion.
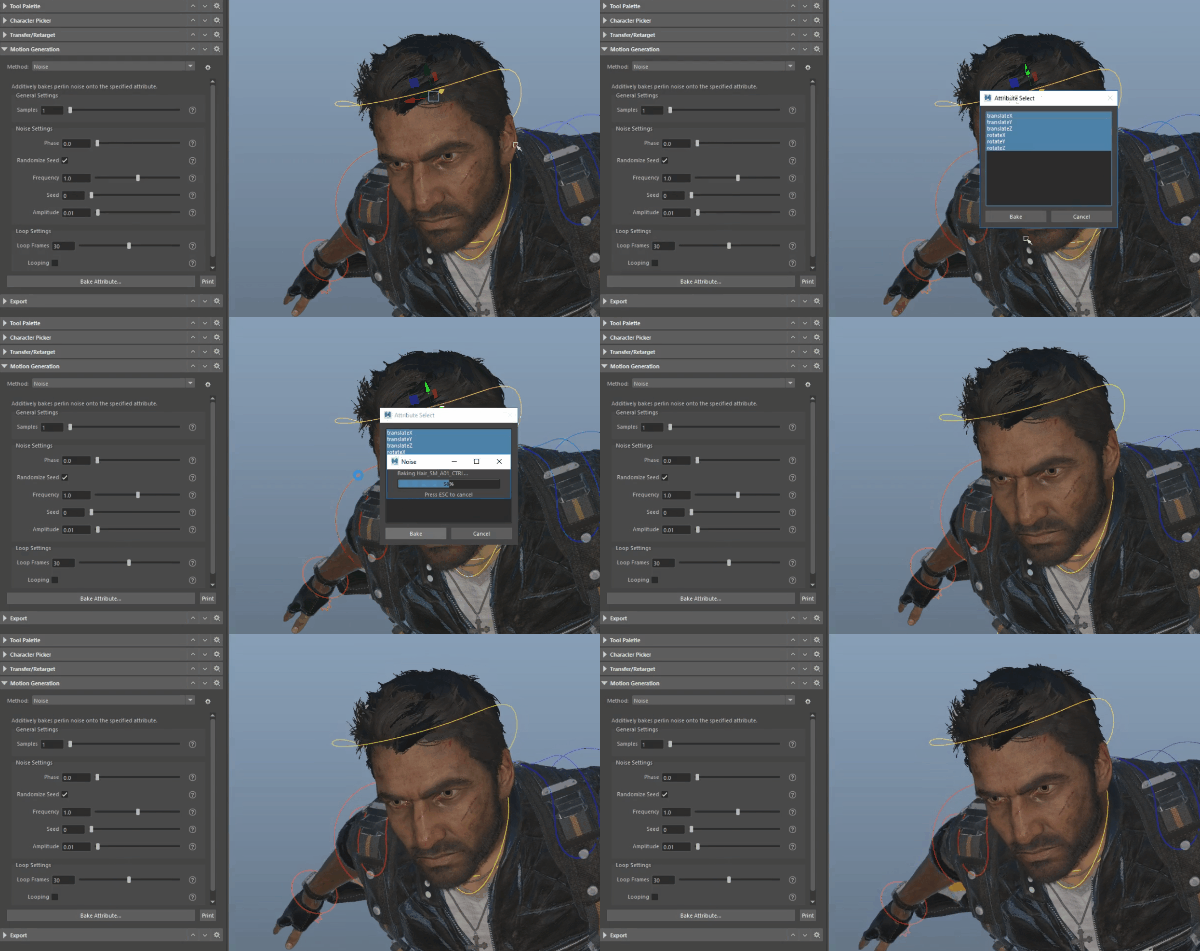 Additionally I also included a noise generator. This simple inclusion runs very quickly, and was helpful for creating wind additives and camera shake.
Custom Scripts Toolbar
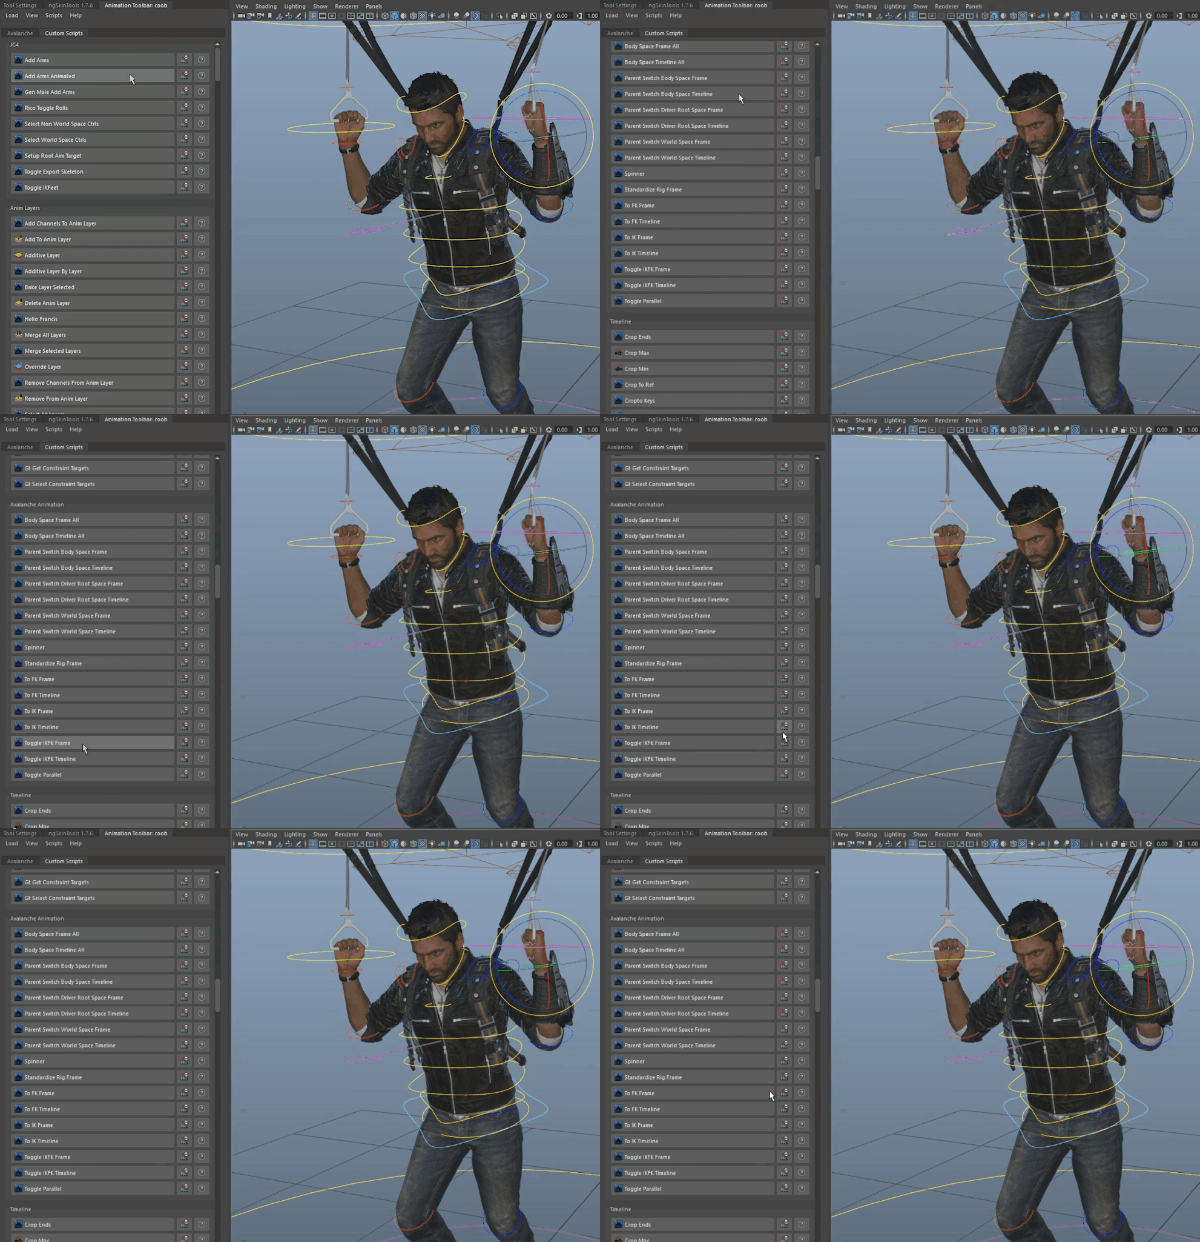 At avalanche we were fortunate to have a team of animators who were for the most part fairly technically competent. Many would write their own mel scripts to add new features to their toolset. However these features were often shared on a shared drive outside of source control, which caused all sorts of issues.
The solution I implemented was a custom hub for sharing scripts. With this tool, animators could browse custom scripts and add them easily as hotkeys or shelf buttons.
Tools were loaded from two locations, one in the users scripts folder and one on our central tech server. So users could test there own tools locally, then check them into Perforce to be added to the shared library.
This toolbar also became a simple way for myself to share simple scripts with other animators. As runtime commands were generated from the scripts, I could share the simple mel command rather than a python snippet to animators.
Selection Tools
Occasionally, mel scripts animators built were so useful that we ended up creating an official version to add to our pipeline. The best examples of these were custom selection sets and pickwalking for our rigs.
Selection Sets
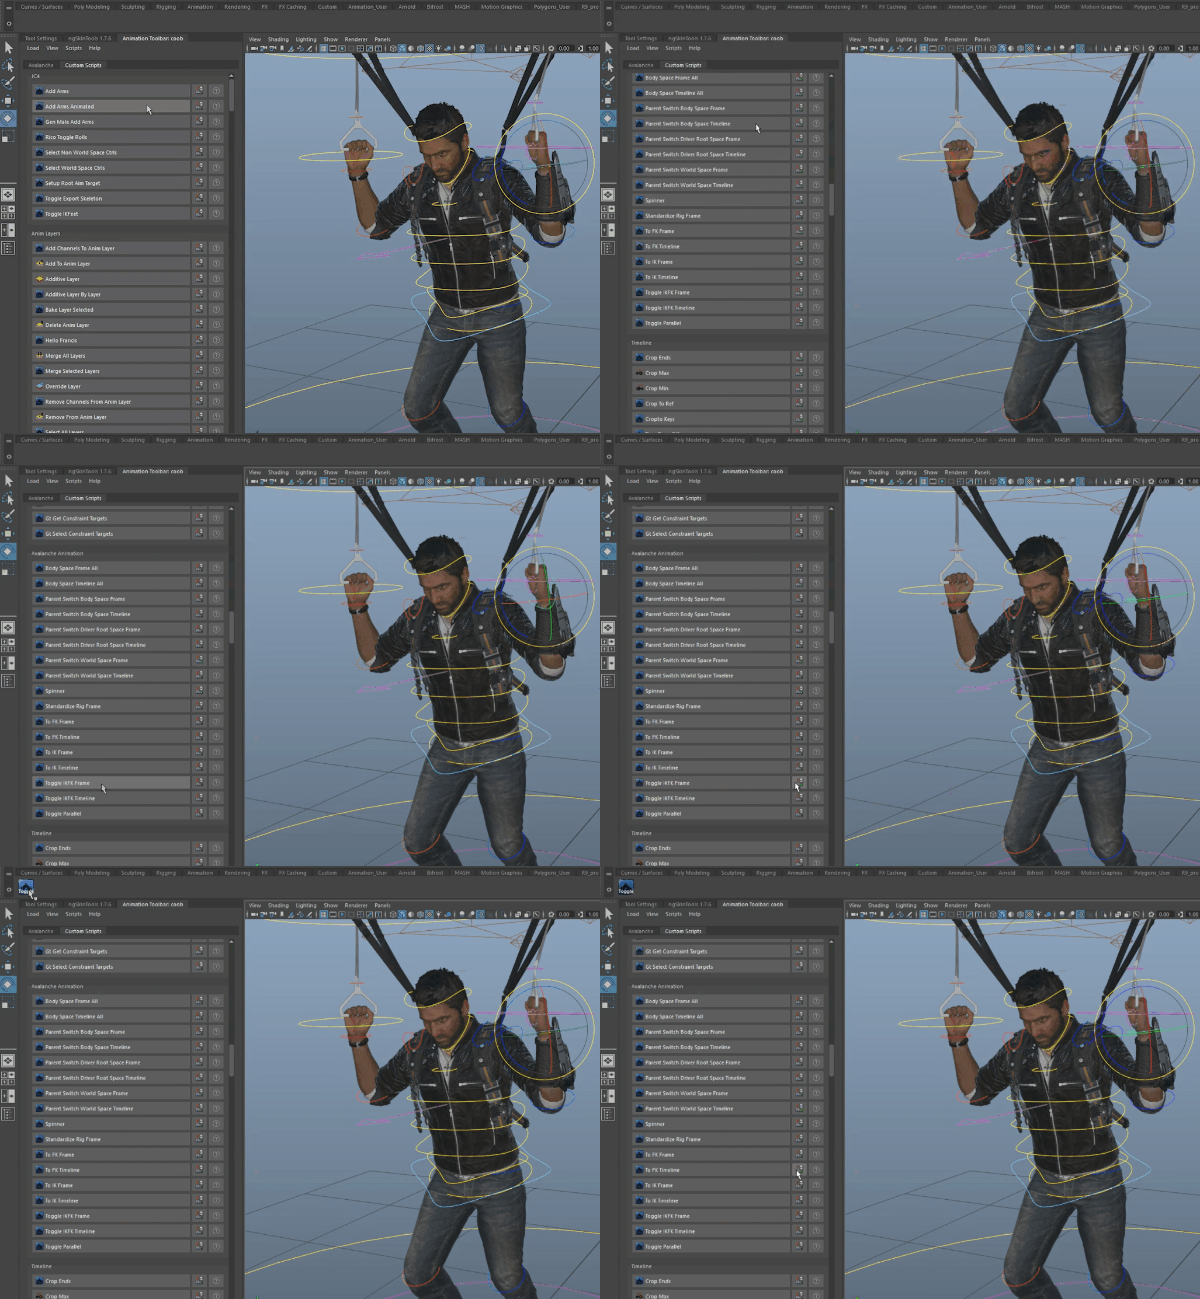 Selection sets allowed animators to associate objects in the maya scene with one another. This way a
 select_set hotkey could select the associated group to the current selection.
The key here was that they worked on top of existing rigs. Animators did not need to update rigs to add these associations, instead they were sourced from a .json file in a centralized location. This file existed both locally and on our tools server, so the animator can update sets additively.
These sets could also be added with a simple selection set tool.
Pickwalking
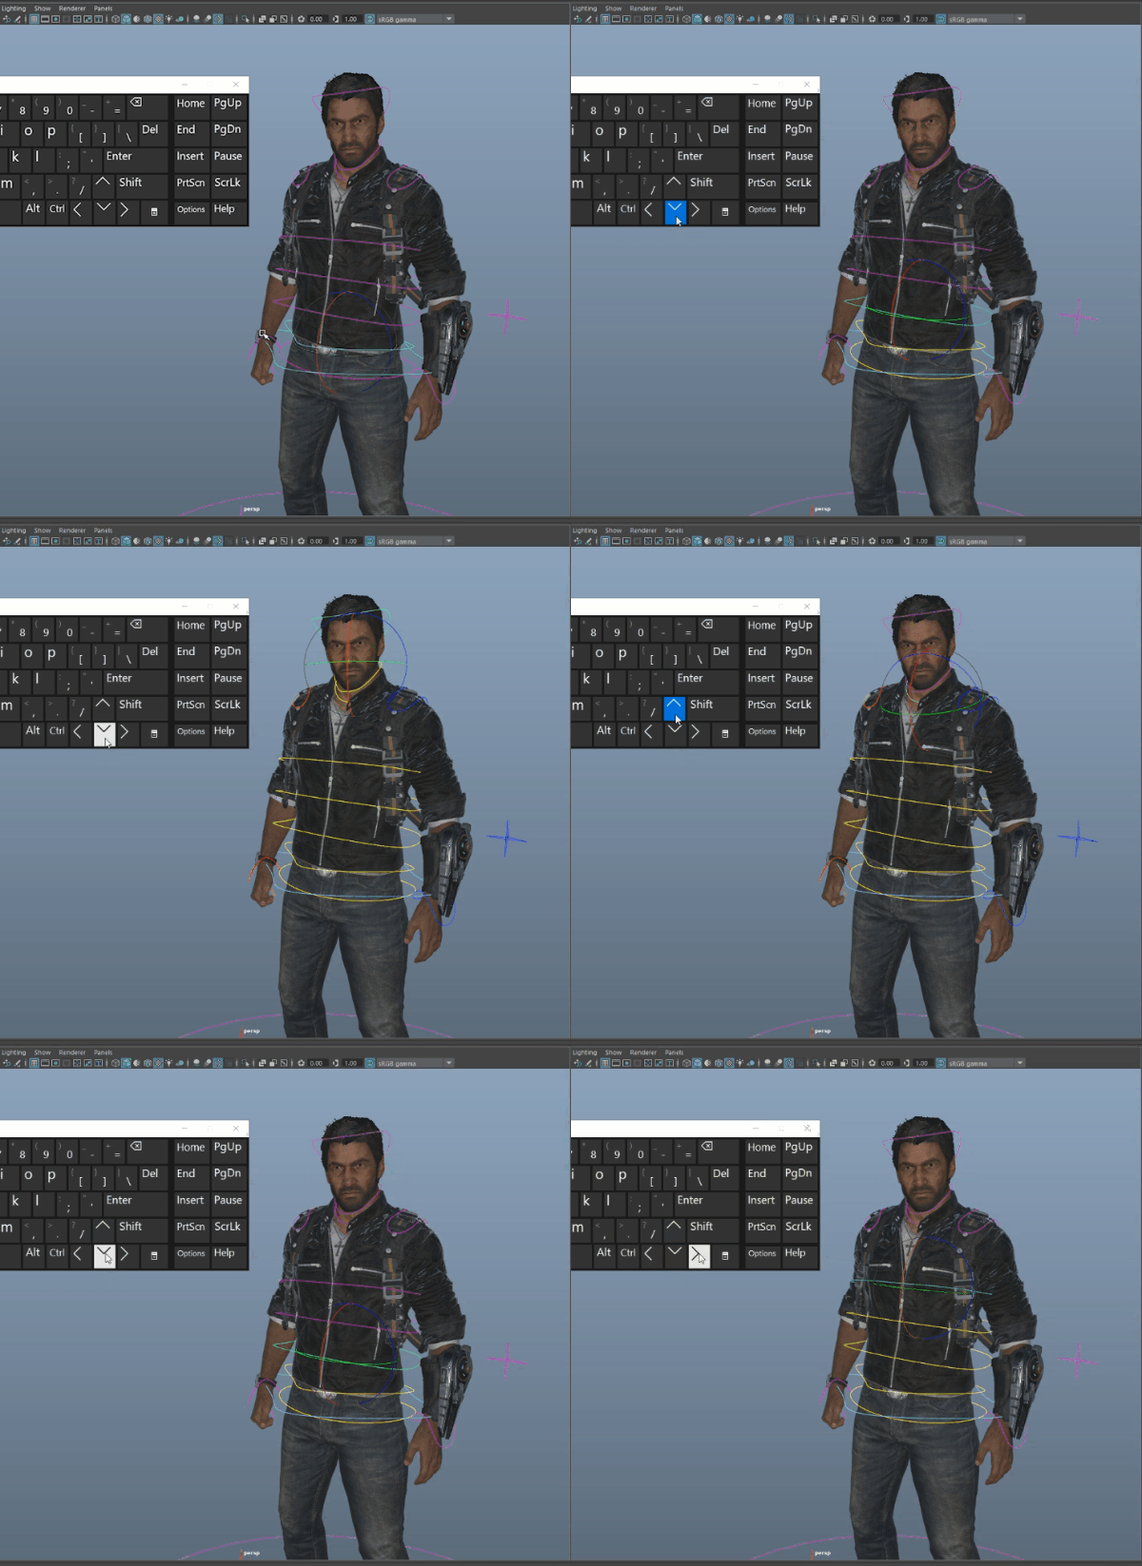 Another script often used by our hotkey-oriented animators, was one that added custom pickwalks to our rigs. Essentially it used hotkeys bound to the arrow keys that could be used to navigate the rig without using the mouse. This way controls could be selected while hidden, and facial controls could be navigated easily.
Similar to our selection set system, we added default pickwalks sets to all our rigs, as well as the ability to locally update those via a simple editor:
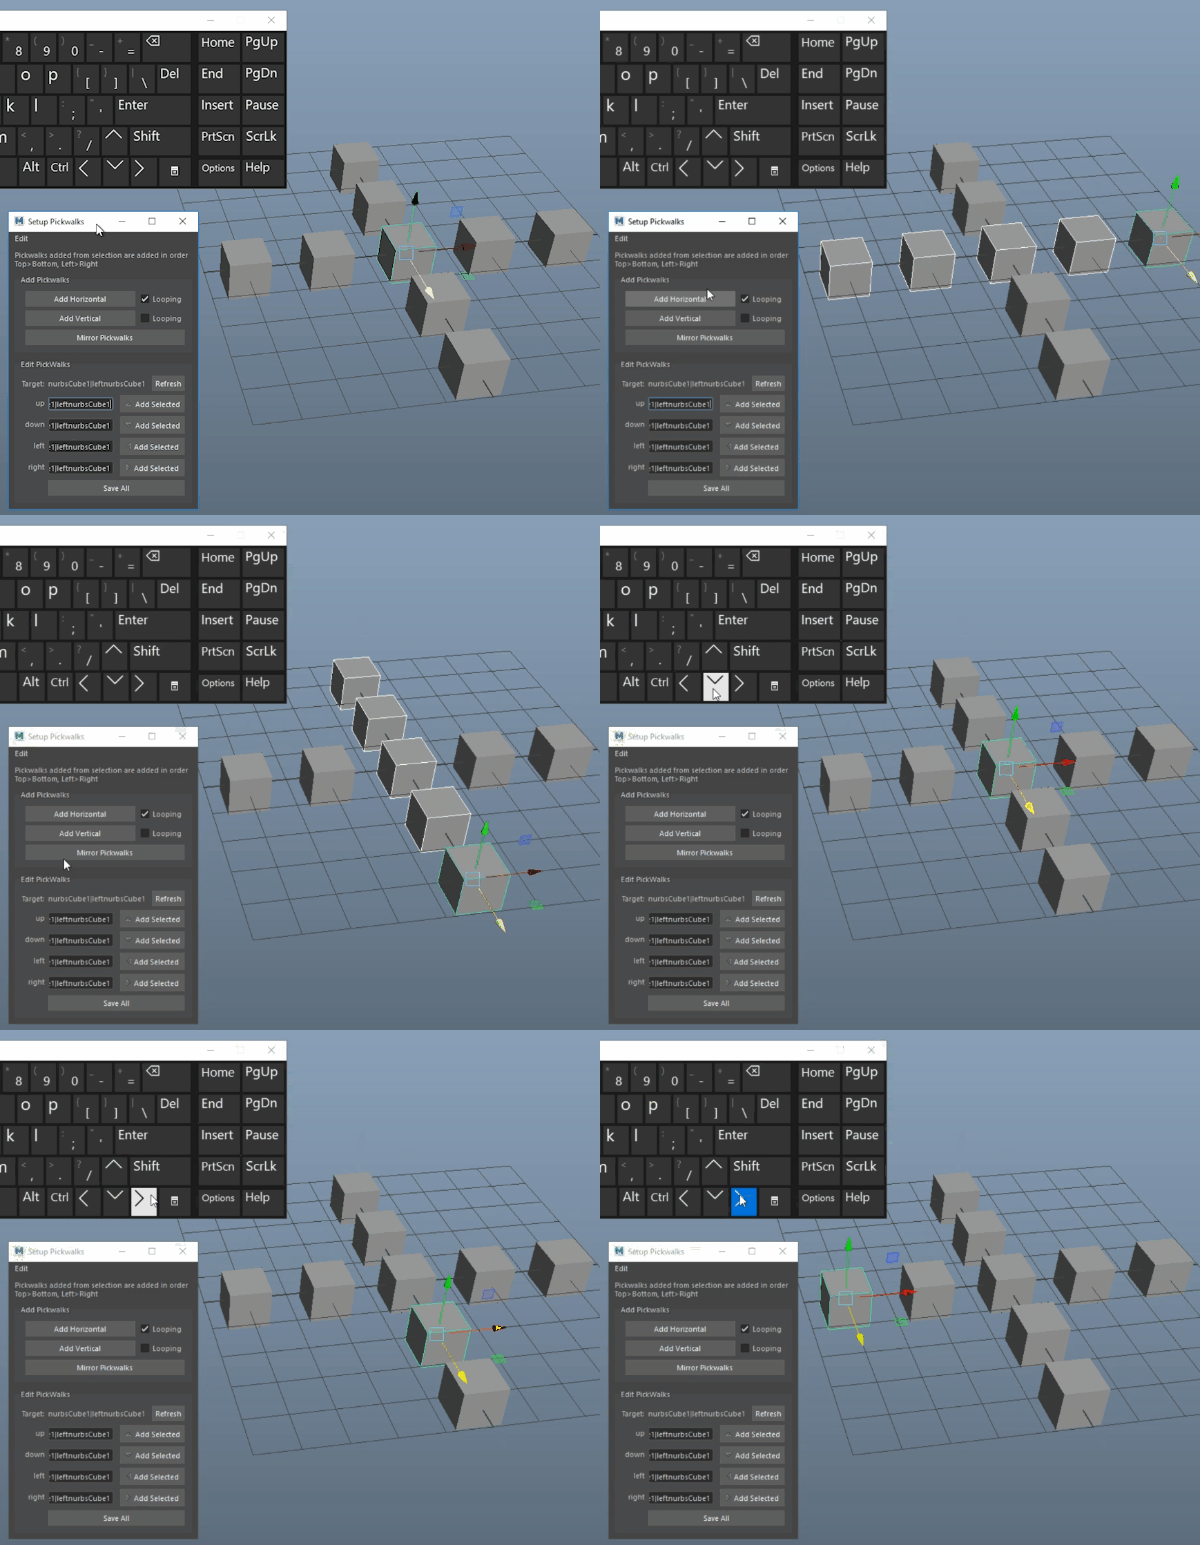 These were also setup on top of rigs, so the animator would not need to modify the rig file.
Rotation Order Match
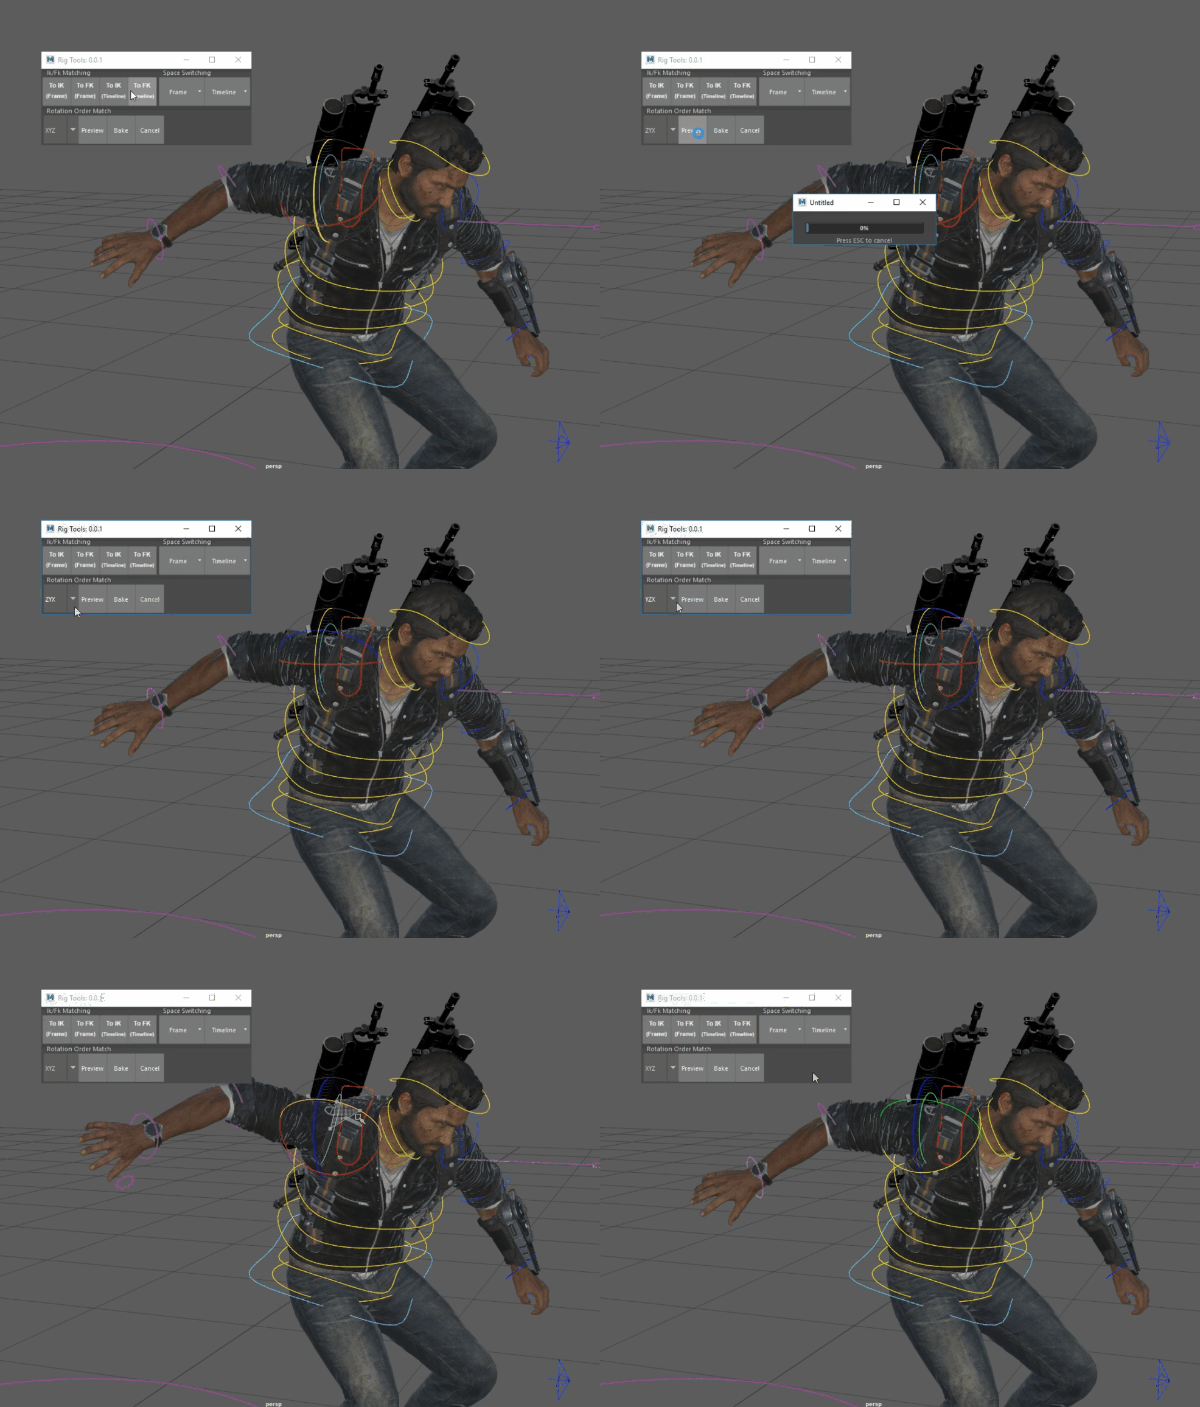 While our toolset already included an ik/fk match and parent match, I added a new switch for baking to a different rotation order. This way Animators could bake around gimple lock situations.
Before baking, the animator could also preview which rotation order they wanted before baking to the final animation.
Custom Studiolibrary
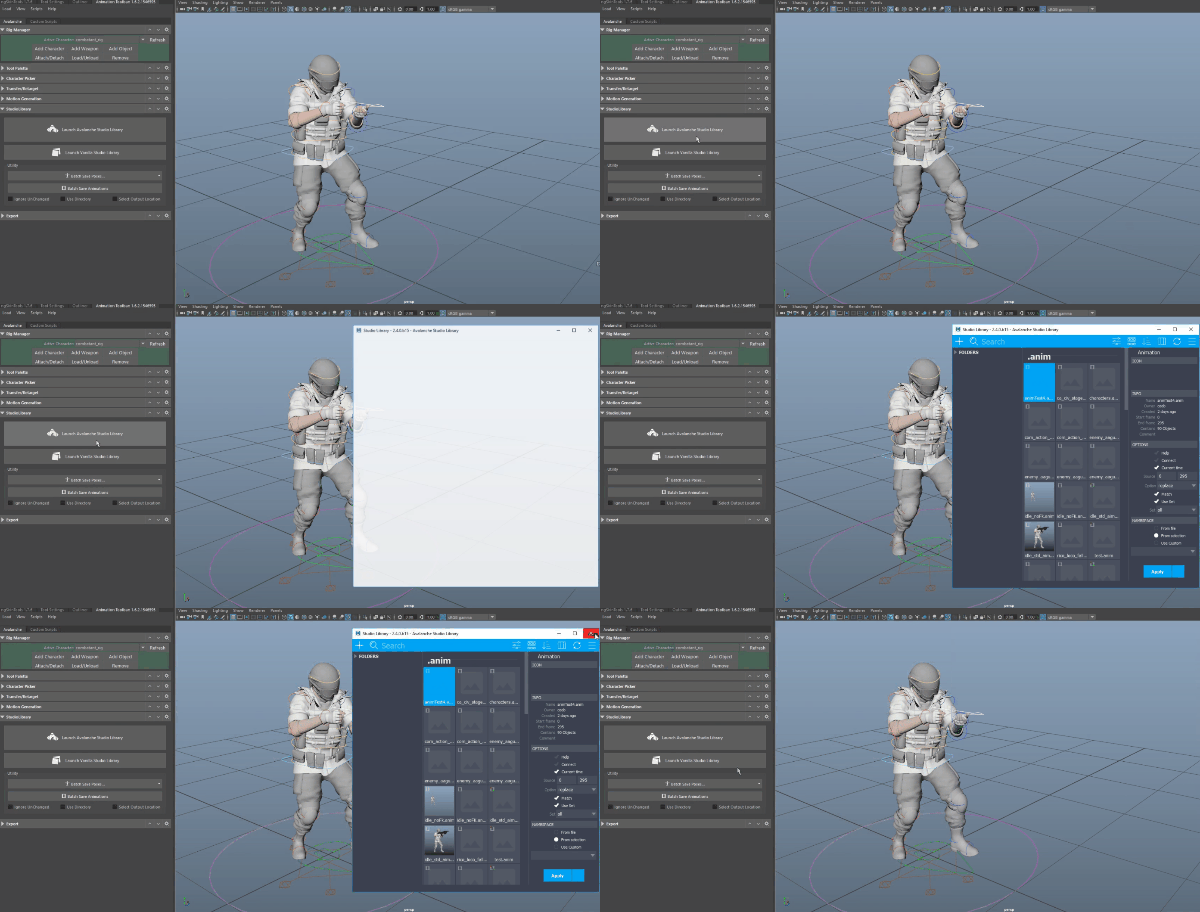 When I started at Avalanche there was no proprietary pose library per say. Instead the majority of animators used a free and open source tool called Studiolibrary. For the most part this tool handled our animators needs, however there were a few features missing that reduced quality of life.
These features mostly involved avalanche rig specific features. Studiolibrary works without the idea of what a “rig” is, and is essentially a list of attribute values and animCurve nodes.
To solve this we devoted some time to create a private fork of studiolibrary to add our custom functionality. These changes were all additive, using class inheritance so that the source code was left unmodified. This way we could reduce the headache when updating source studiolibrary and clearly seperate what was changed.
Here are some of the key features added:
Selection Sets
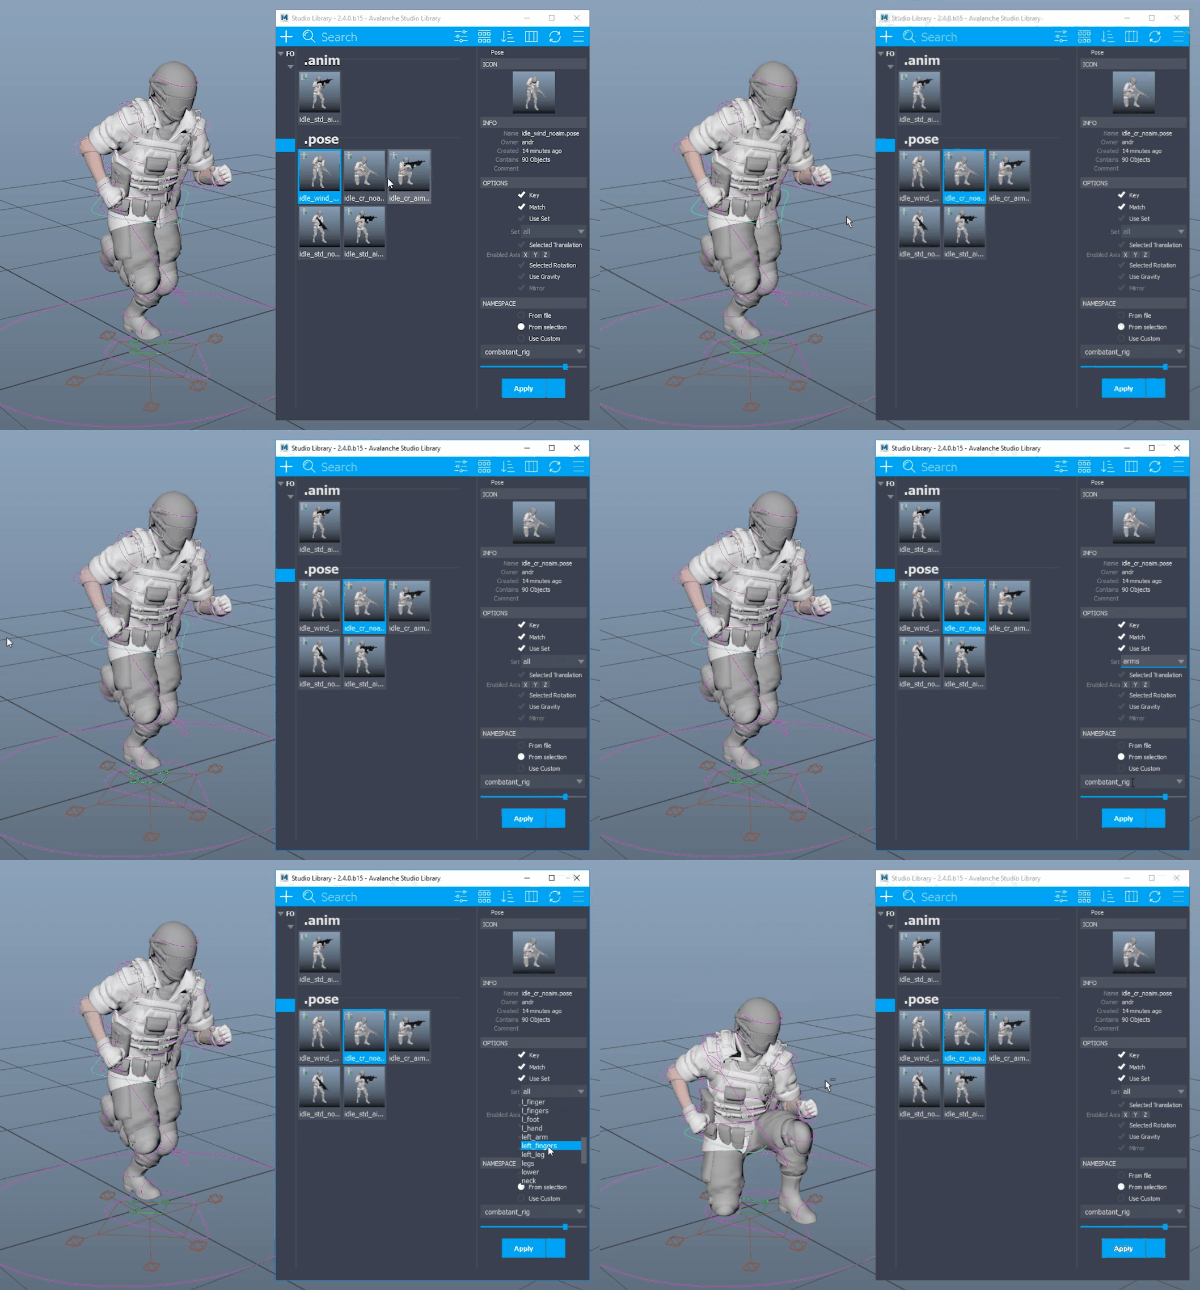 Very often we found animators would want to apply an animation to the entire rig, or a portion of the rig, and would need to manually select those parts. This process can be tricky when hidden controls are involved, as well as with the volume of controls in our rigs. I added a simple selection set dropdown for apply poses and animations. This uses our selection set system to override the selected controls with the one in that set.
IkFk Matching
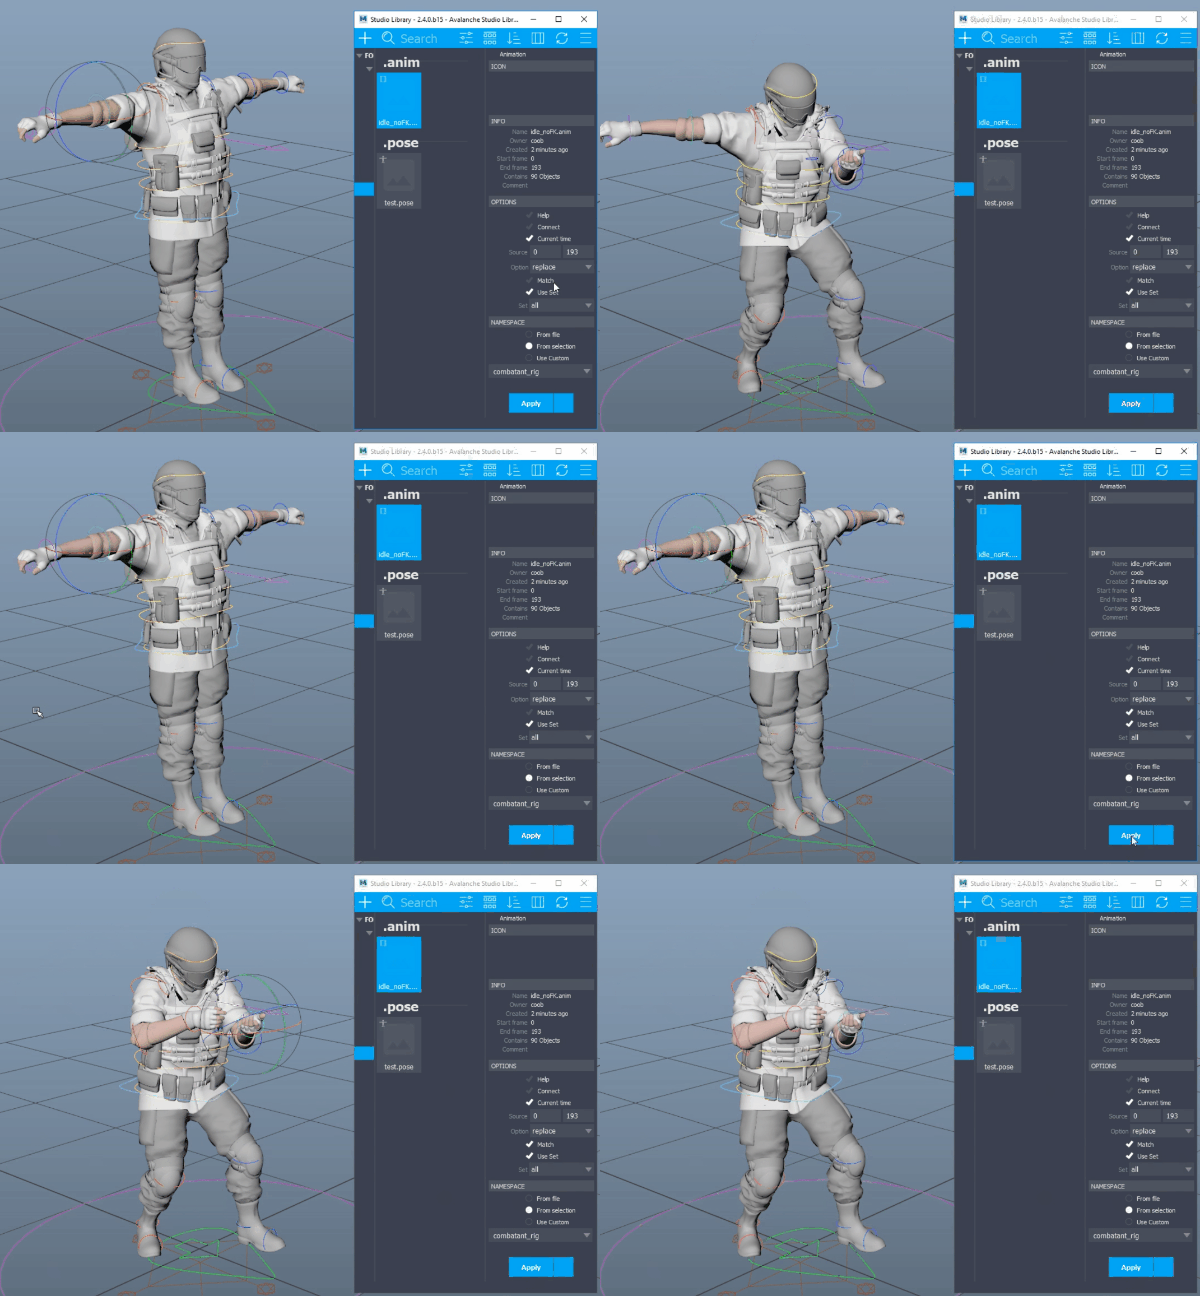 When animating, very often the animator will primarily be using either the FK or IK chain for different limbs. While studiolibrary will save those values if selected, when applying a pose or animation to a rig in a different state, a mismatch occurs resulting in an incorrect pose. The “Match” check box solves this by checking if theres a mismatch between IK/FK states and running a match if needed. A similar process is run for parent spaces and rotation orders.
Perforce Support
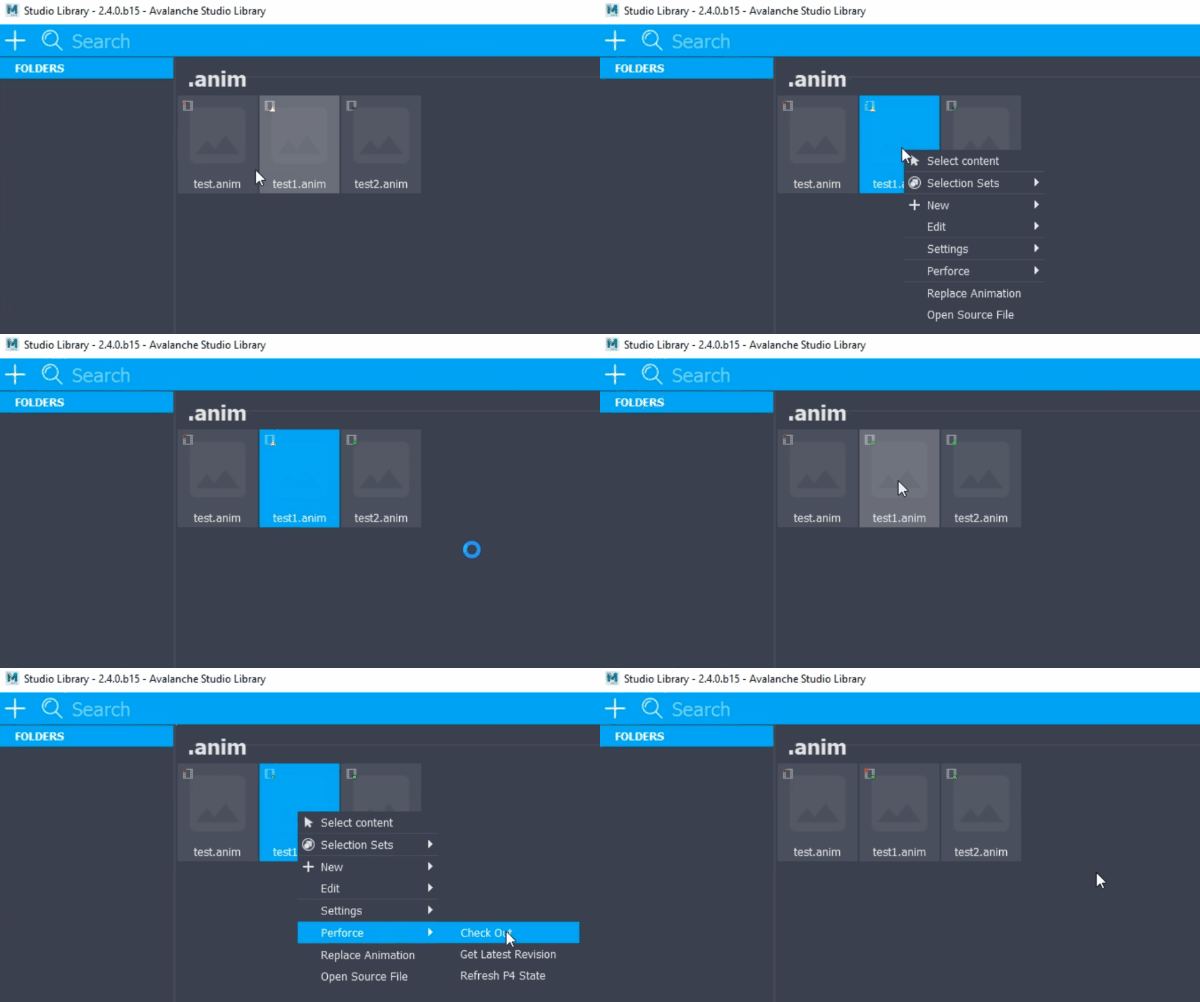 Previously, the animators would use a shared pose library on a network drive. This method, while convenient, is inherently destructive. When establishing this standardized avalanche pose library, we placed the files in our perforce depot to avoid these issues. To make this process more user friendly, I added an icon to each pose in the depot to indicate its state in perforce. Additionally options are available to get latest and check out poses from inside Maya.
Relative Poses
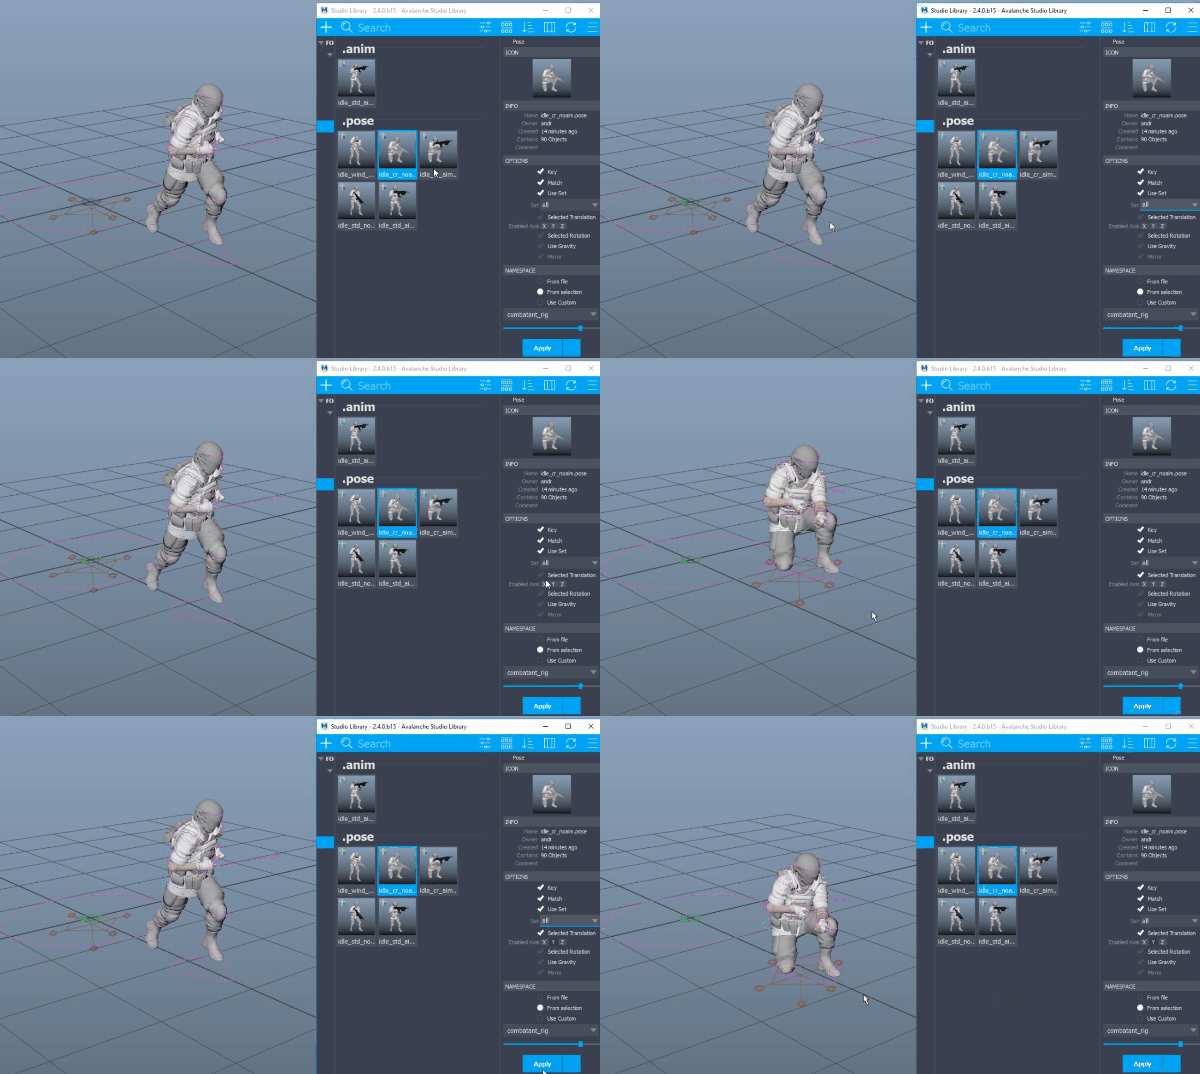 One of the handy features of Motion Builder’s pose library is the ability to preserve local translation and rotation. Very often a pose set at the origin point would be needed at another position in the world. While vanilla Studiolibrary would merely place the character at the origin, the selected position checkboxes allowed for individual axis’s to be preserved.
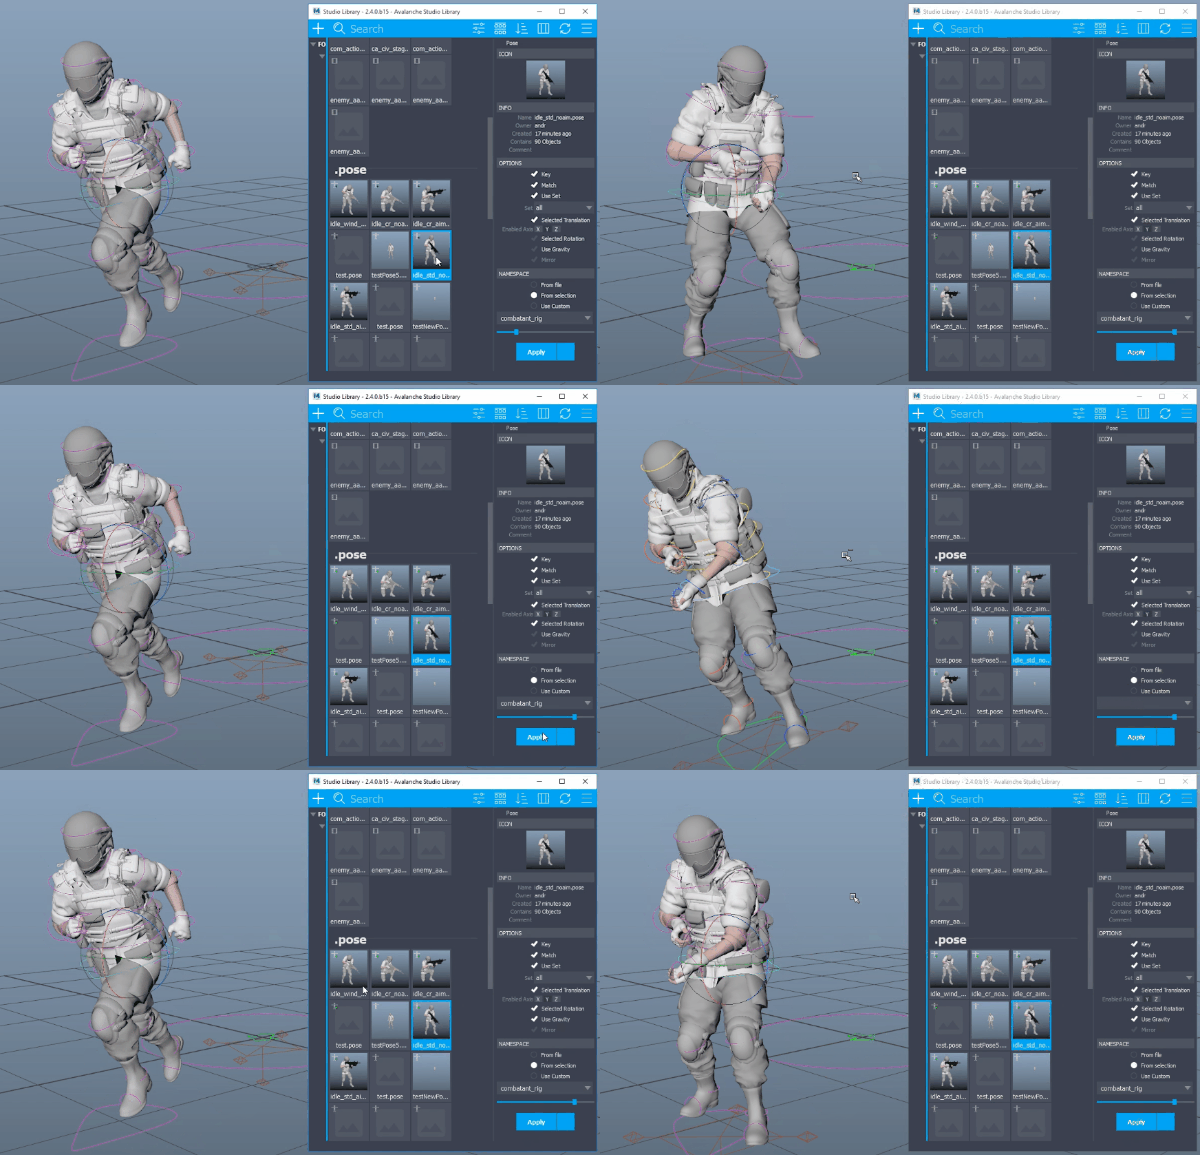 For selected rotation a similar method was used, however an additional gravity check box was added. This box works similar to the Motion Builder equivalent. Essentially animators often want the facing rotation of a control rather than the actual rotation. The gravity check box ensures only the rotation around the world Y axis is used for the selected control.
Rig Switching Optimizations
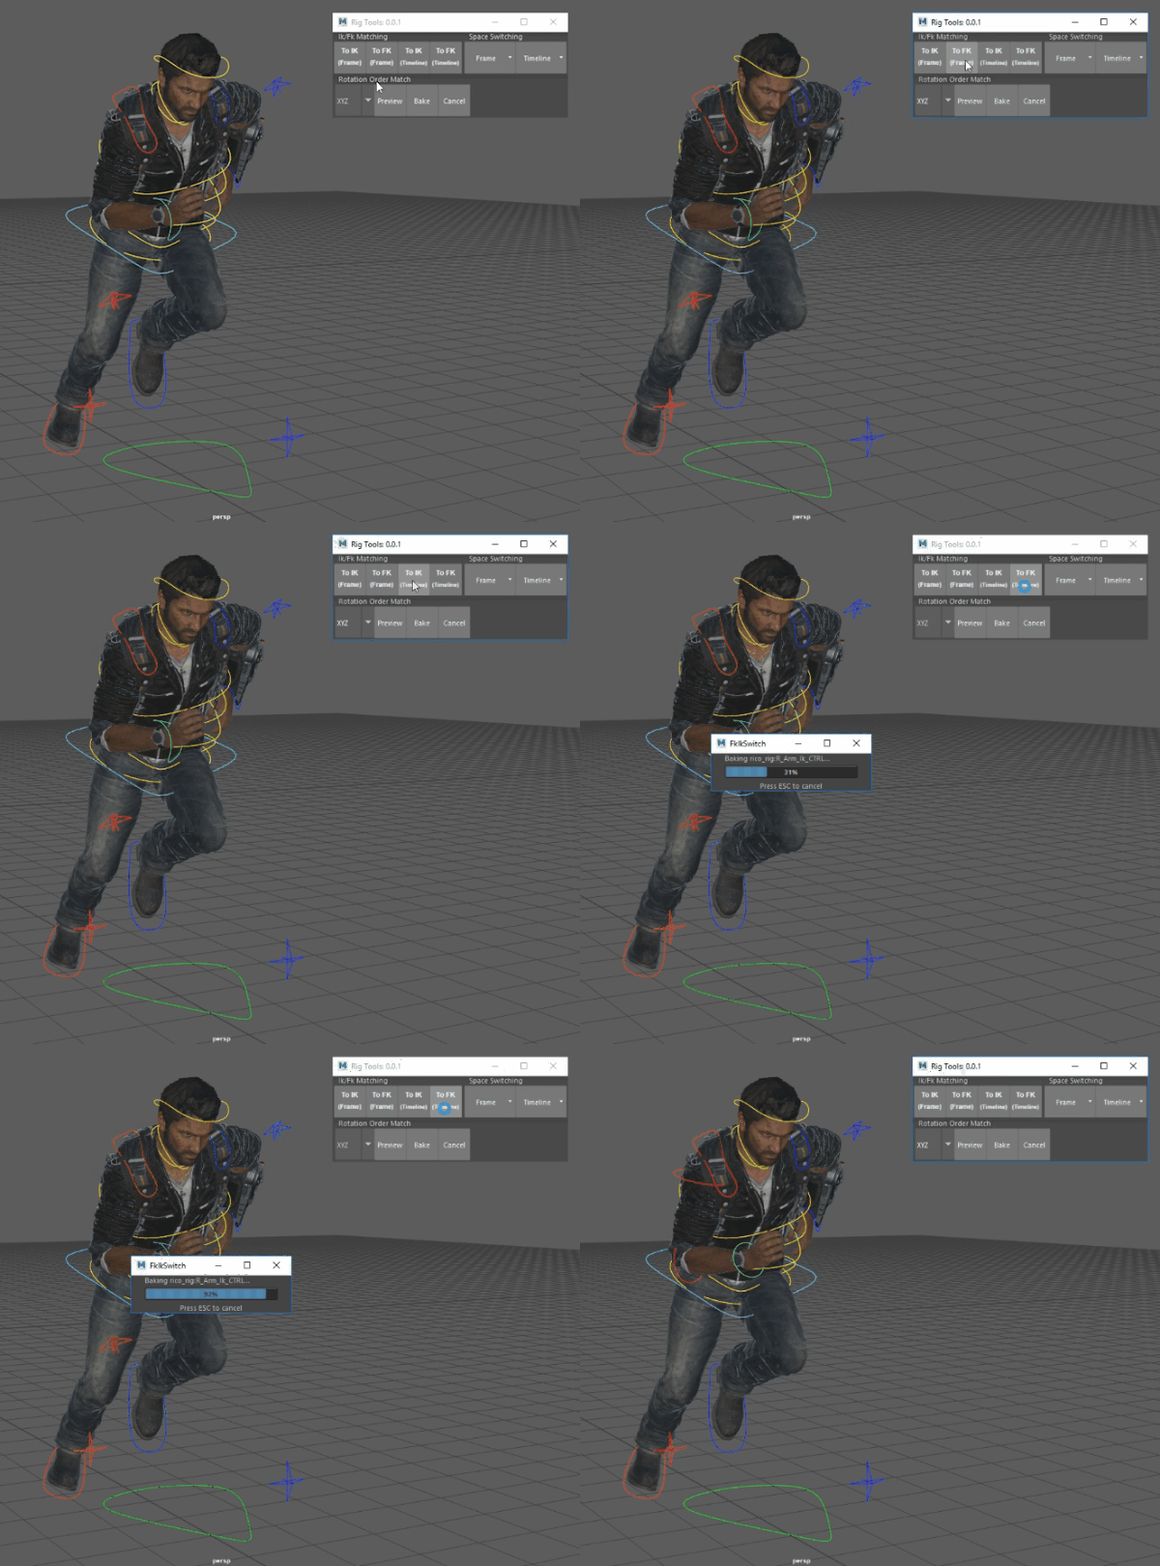 While Avalanche already had tools for parent switching and fk/ik switching, I had the opportunity to do an optimization and refactor pass. The results were that these tools operated at 4x the speed, reducing 5 second bakes to a little over a second.
Additionally these tools now supported baking to animation layers. This was necessary to support motion stored on additive layers. These tools smartly determine if a layer is needed and bake to an override layer.