Just Cause 4 Rigs
17 Oct 2018 #Tool #Maya #PortfolioRigging Support for Just Cause 4
During the development of Just Cause 4, I had the opportunity to improve upon our major prop rigs from Just Cause 3. For those not familiar with the franchise, the main character Rico Rodriguez navigates the world with three primary movement options: parachute, wingsuit and grappling wire. These movement options are a key component of the game and are used constantly throughout. During development I rigged the parachute and wingsuit as well as the cinematic grappling hook.
Coming from Just Cause 3 however, it was apparent from a rigging perspective that these would need an upgrade. Previously, with only one Tech Animator on the project, there simply wasn’t the budget to build complex solutions for these rigs. Additionally, as Just Cause 4’s main theme was extreme weather, the rigs from the previous game would need to be adapted to simulate extreme conditions.
Overview
The main challenge with these rigs was developing techniques to deal with the high complexity. The rigs were made up of dozens of leaf joints, and needed to be controlled like one interconnected mass.
From the animators perspective, this meant they would need input methods that mitigate this complexity. The solution here would be the inclusion of multiple layers of additive controls. This way broad sweeping strokes can be made on a high level, while maintaining the ability to refine the motion on a lower level later.
In addition to control layers, a high number of joints meant that these rigs would need to involve multiple layers of abstraction under the hood. A common solution I used using tools like surfaces and splines to drive lower layers. This allowed a small number of controls to drive a large number of bones in a natural way.
Lastly when dealing with this many joints, there were many situations where hand building the rig would be unwieldily. As a result each of these rigs were created using build scripts written in python. This greatly removed the manual work needed when building each rig, leaving more room for experimentation. This method of rigging was pivotal in allowing me to create the complex node networks for the various effects on the rig, which needed to be hooked up to dozens of joints.
The Parachute
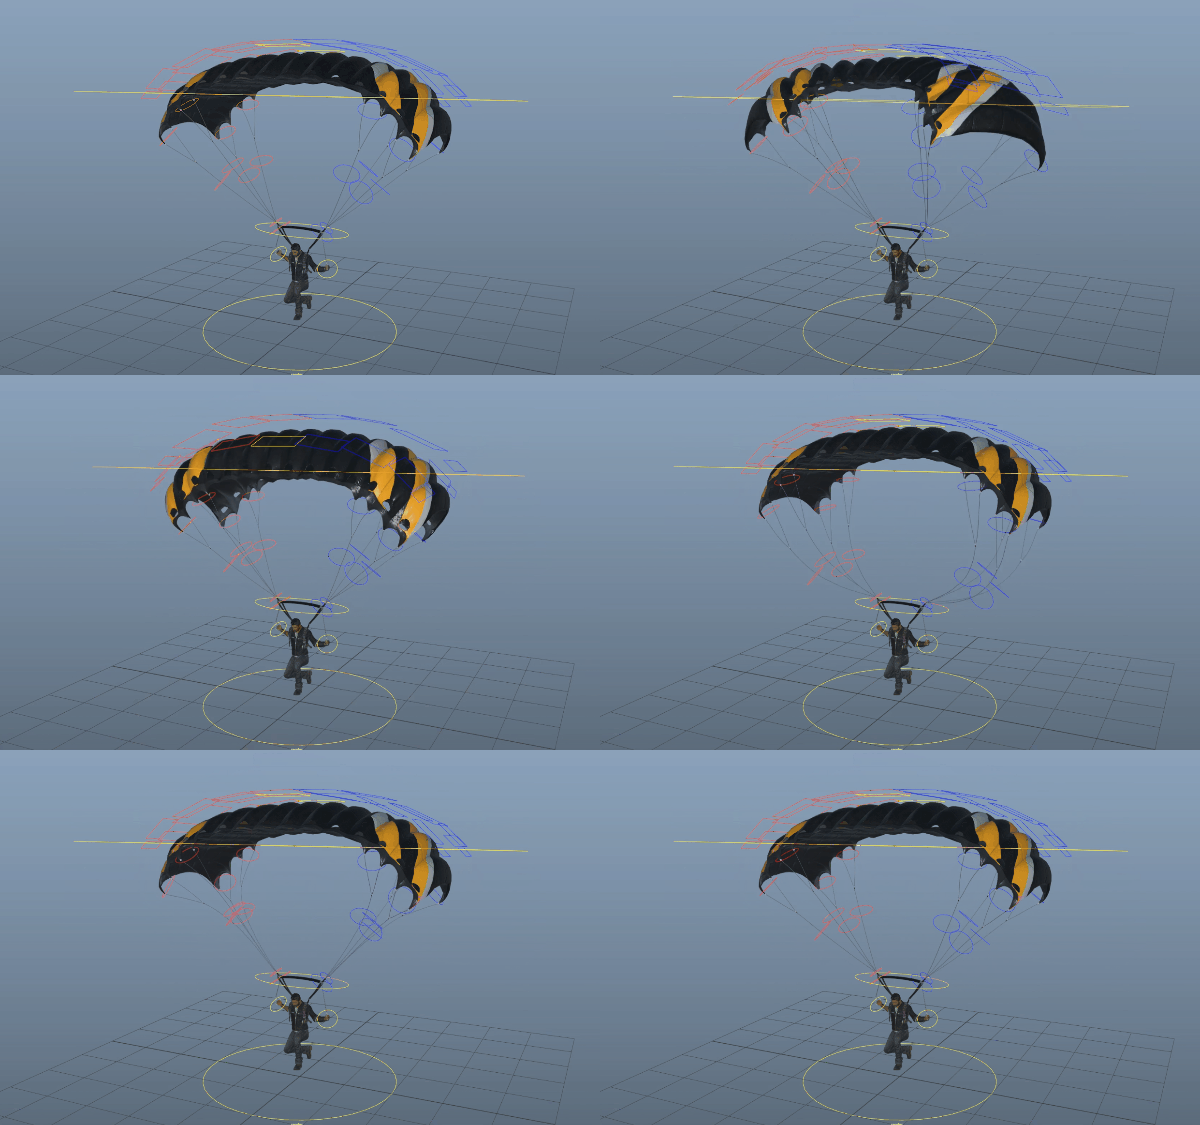 The parachute was by far the most complex of the three rigs. The rig involves three key areas, the canopy, the lines and the harness, which all needed to play nicely with each other. It became apparent when planning the rig with the animator, that we would need three distinct layers. Each of these layers was toggle-able with an attribute on the root controller.
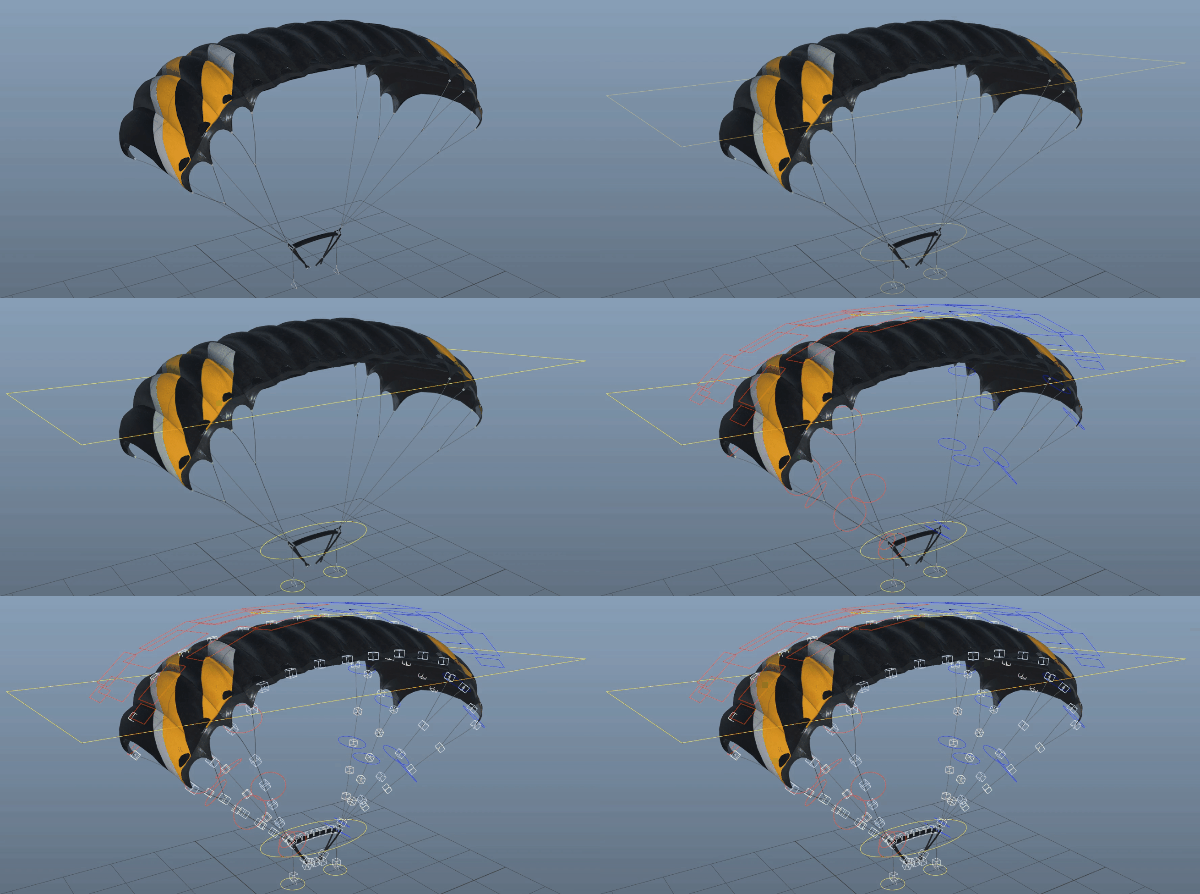 The first layers consisted of only and handful of controls, that gave the animator control over a lot of surface area at once. Here the animator can block out the core motion with ease. Upon the animators request, we bound the canopy controls scale values to rotation values on the lower canopy level, allowing the animator to adjust the curvature of the canopy very easily.
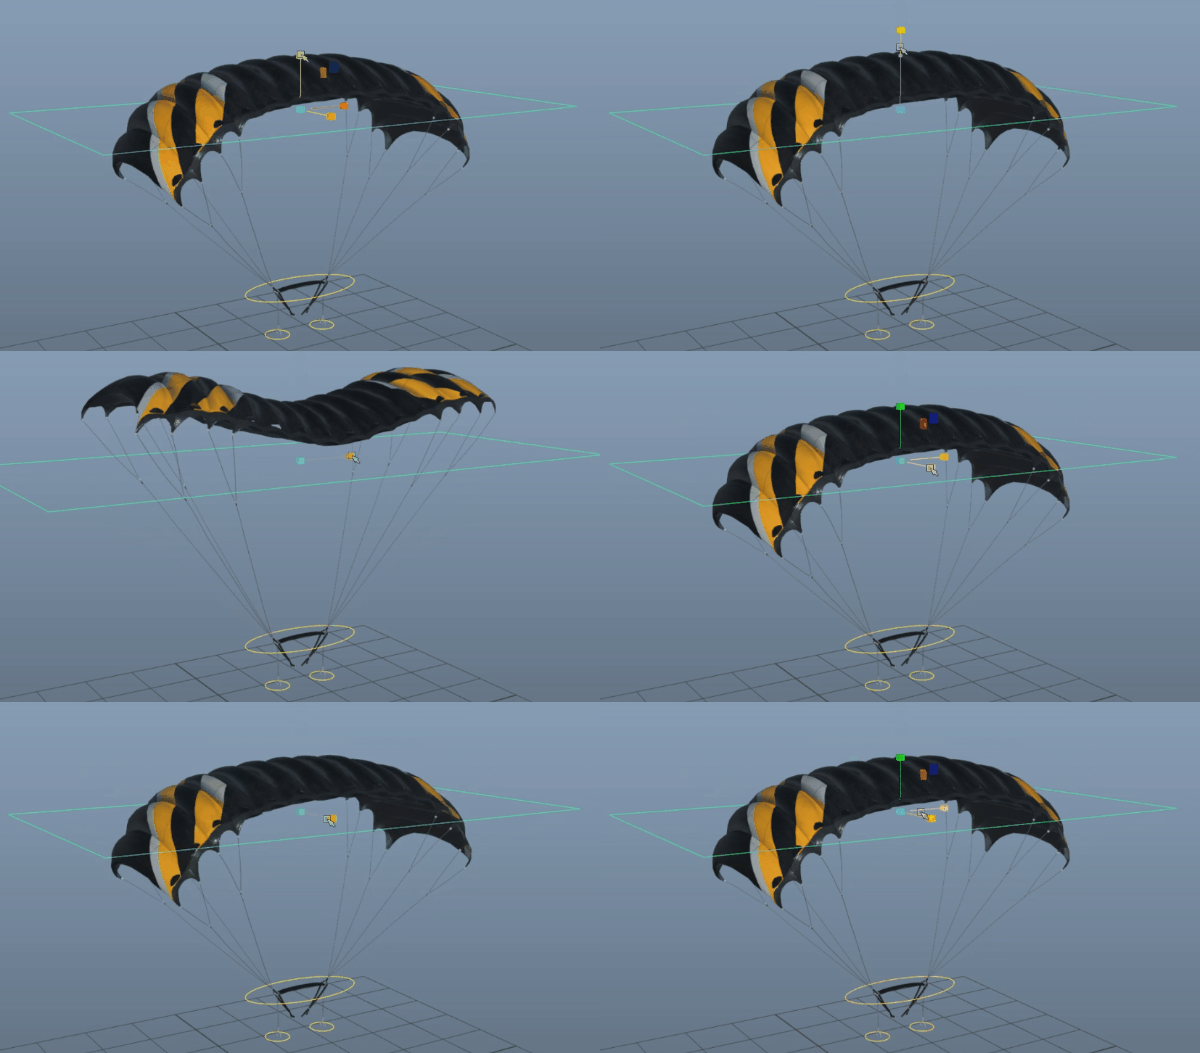 The second layer open up a lot more control. For the parachute canopy, this layer is basically a split tree of FK controls, with the root in the center, allowing for a finer level of curvature control. For rope controls, individual controls were available to offset the curvature of the lines. These were basically bezier curve controls, able to be translated, rotated and scaled.
For the last layer I gave the animator direct access to the bones beneath. Although the above layers give the user a great amount of control, they often rely on abstracted nurbs rigs to actually drive the bones. While this method offers a good balance between simplicity and control, it will never be perfect in all situations. In the case where the other two layers do not behave how the animator would like, this layer can be used as a fallback to fix issues when needed.
Canopy Controls
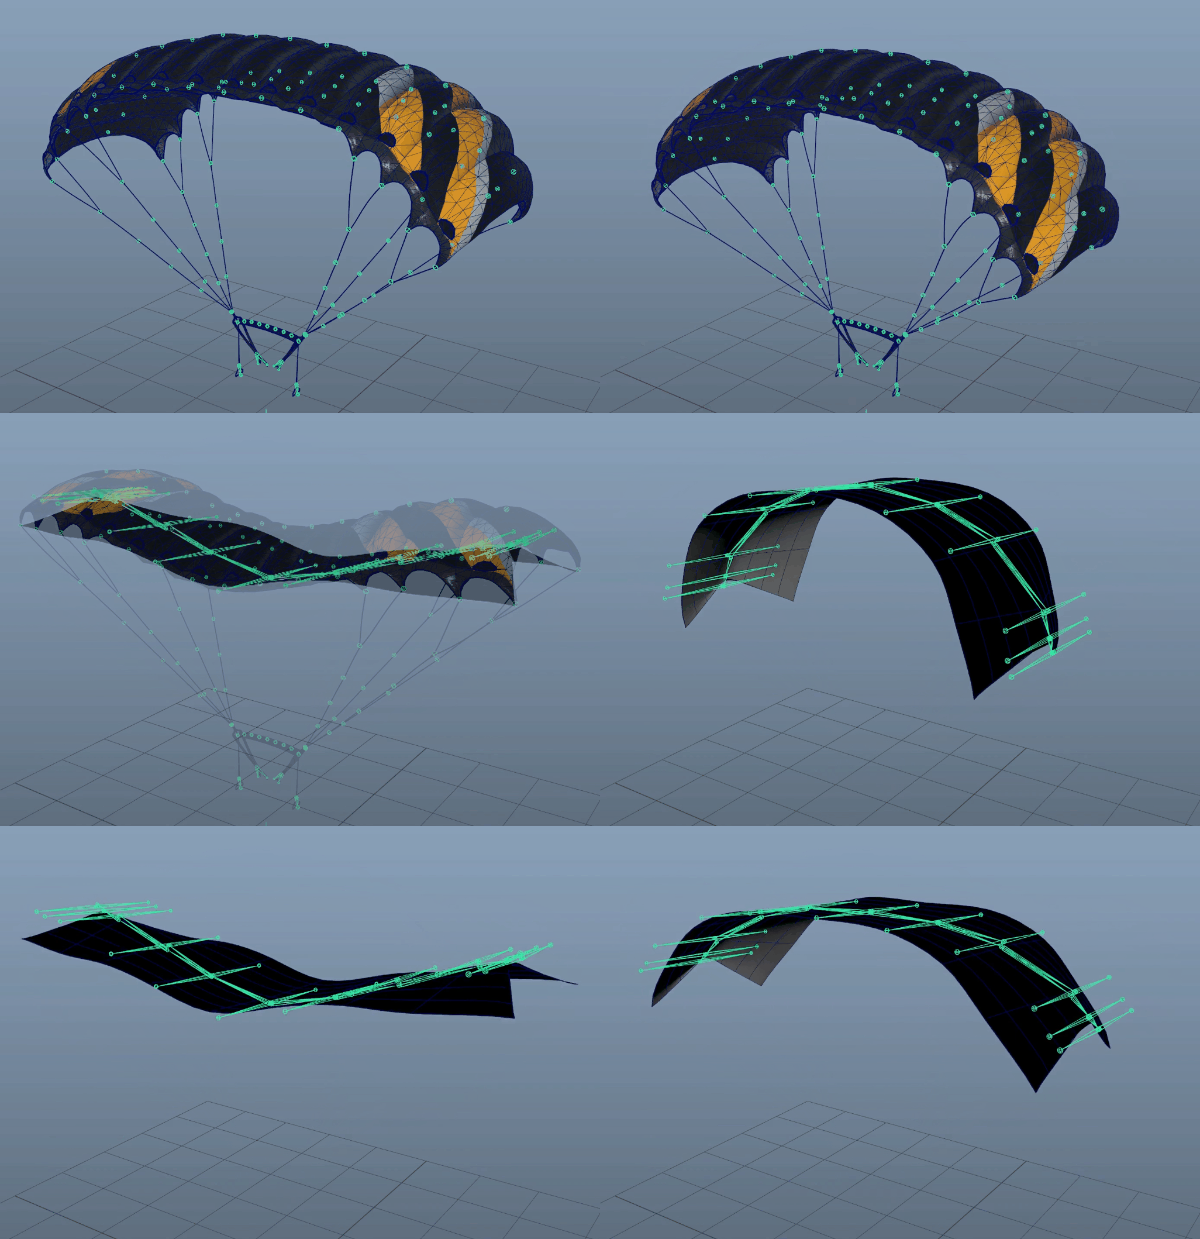 The canopy joints were driven by a NURBS surface that was skinned to its own simple skeleton. The first two layers essentially drove the positions of these bones, which in turn drove the positions of the third layer. This entire component was generated by the build script, including the skinning and the control curves. This way I could experiment with span counts and joint counts.
Line Controls
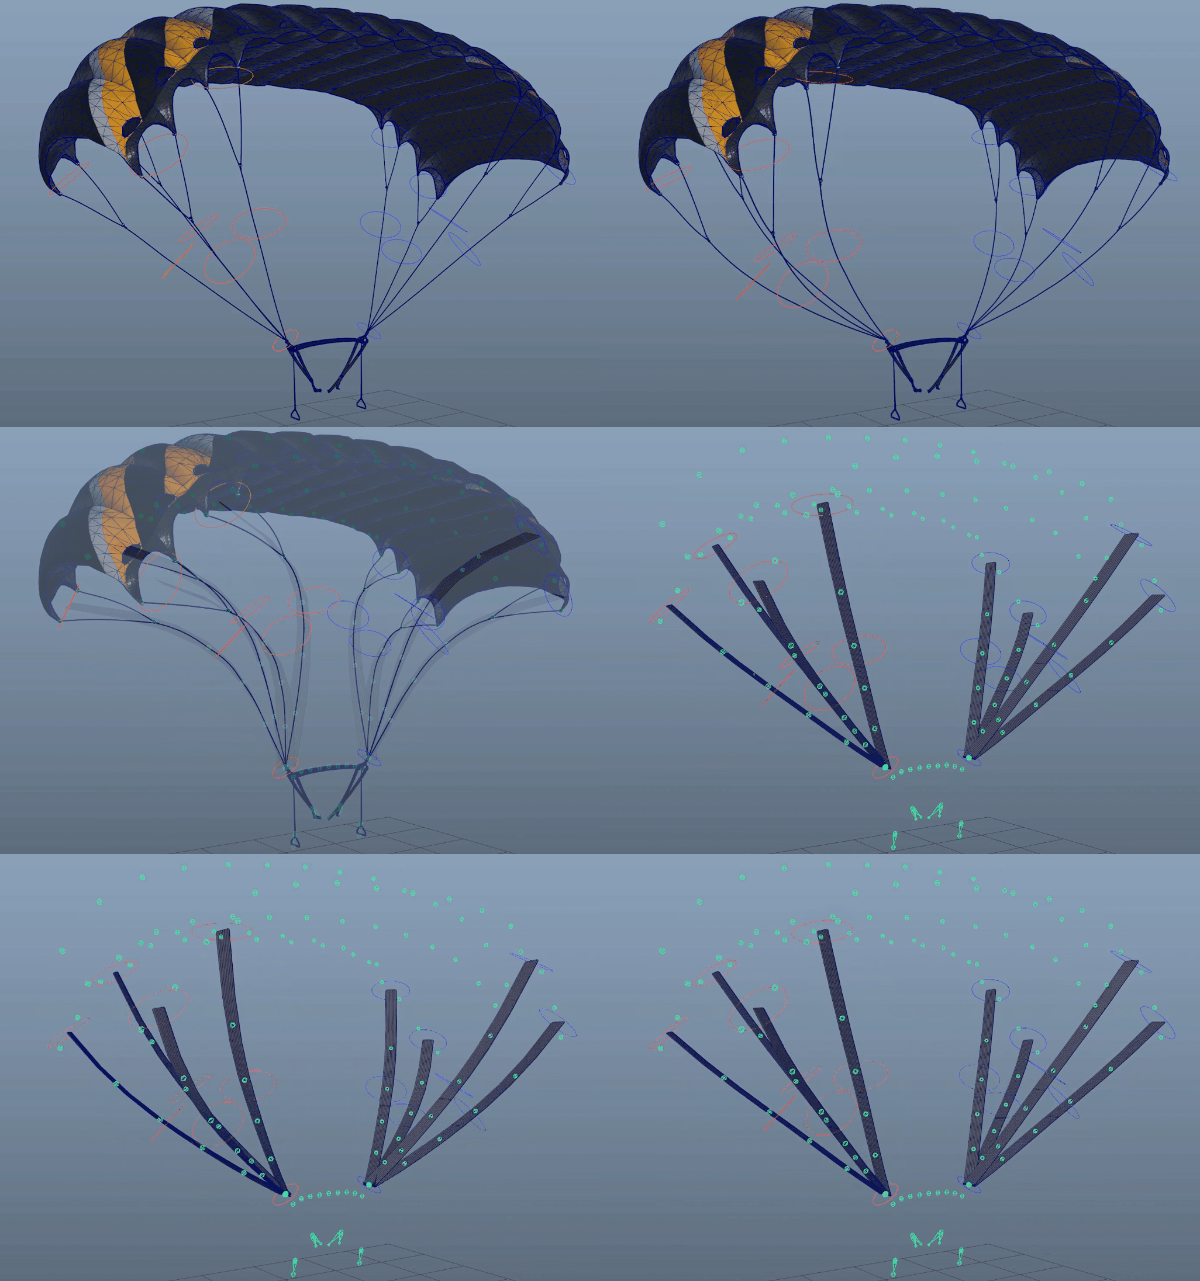 The lines were made up of two layers. The first layers job was to align the strings to the start and end attach points. This way when the canopy or harness is manipulated, the lines naturally follow along as expected.
The second layer was essentially two ribbon spines, each with different joint/span counts. The first involved three control points and drove the second spine that included six. The ribbons were handy for automatically solving the twist of the lines, ensuring there were no unnatural twists.
This layer also involved a fairly simple squash and stretch effect. This was necessary for preserving the shape of the lines at different lengths.
Wind Controls
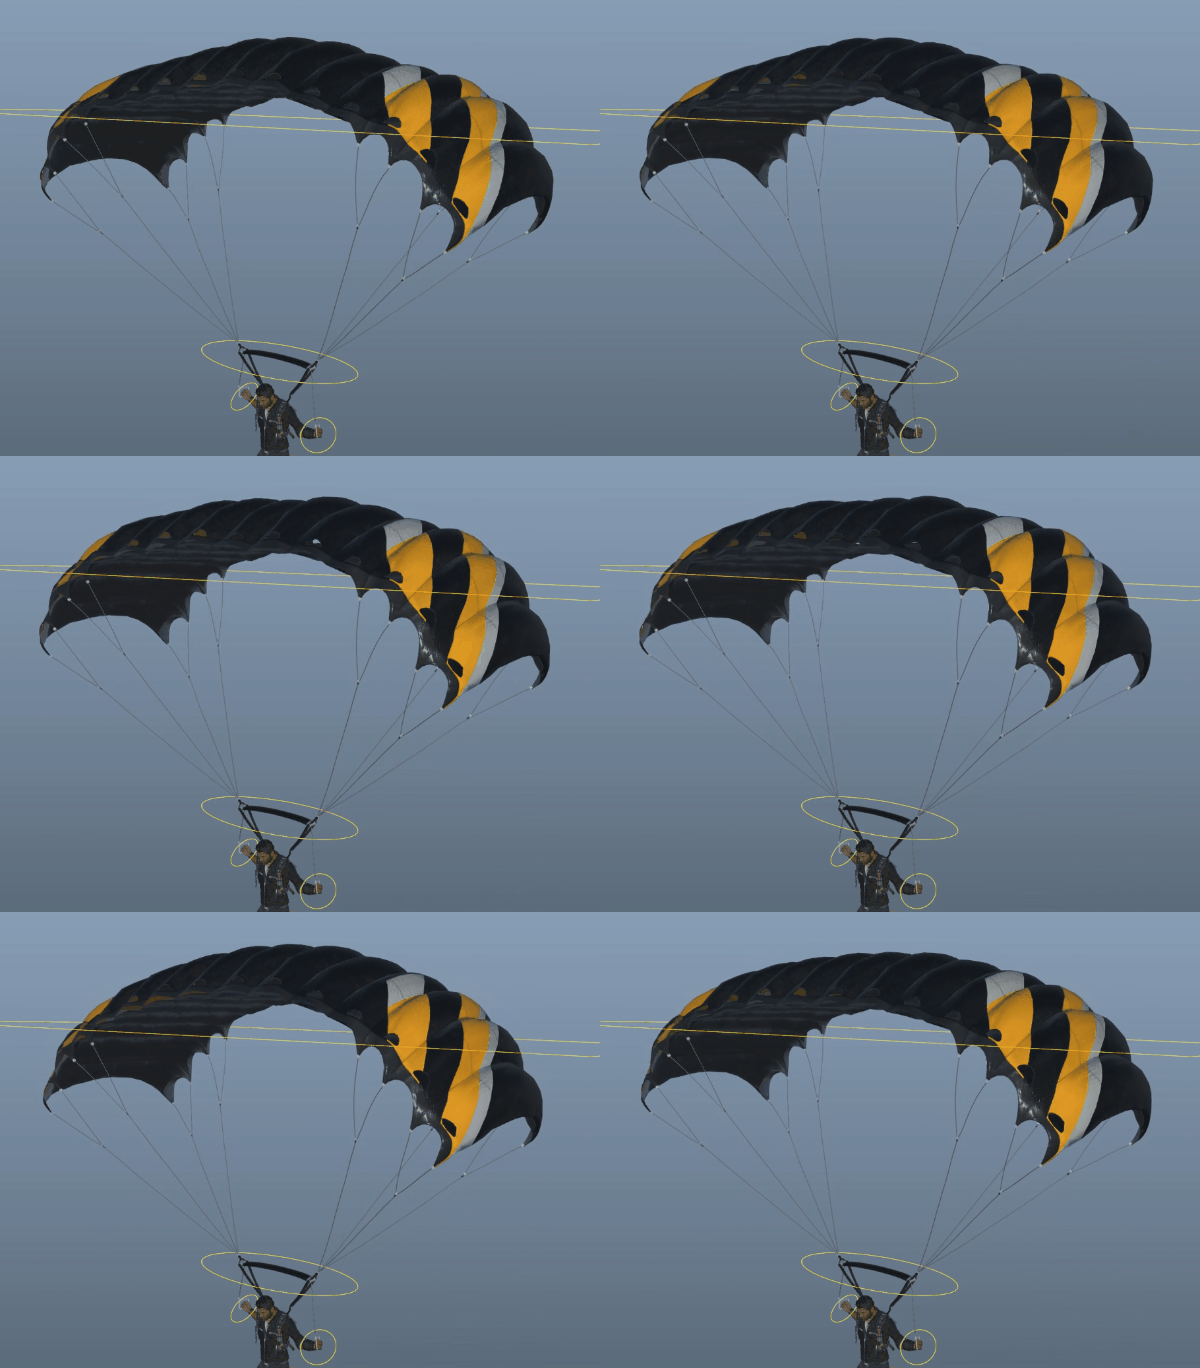 Wind is an important gameplay element for Just Cause 4, and as a result the parachute would need to react to different intensities of weather. While there’s several methods to create sine wave node setups in Maya, I ended up using an entirely factory-node based approach in all three rigs. Both the translation and rotation were calculated for each control so that the would appear to “ride” on top of the wave.
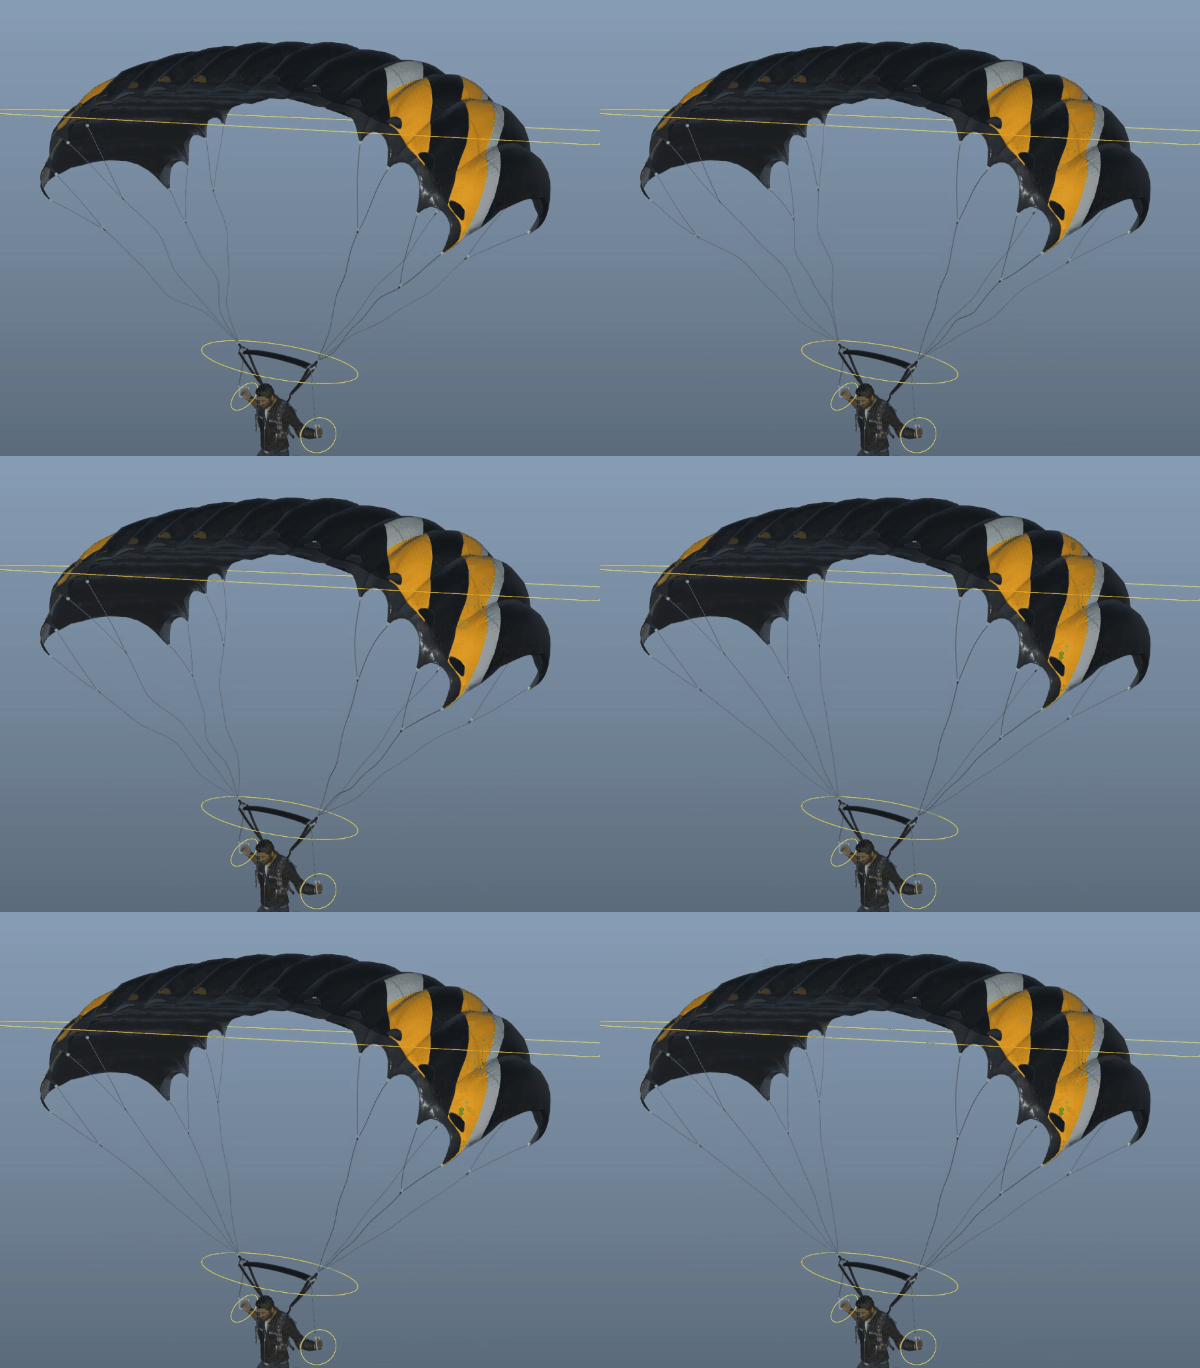 The lines each have two sine waves, one forward and back and one side to side. Each of these had separate amplitude and frequency controls. The canopy however required for the waves to be calculated in 2D, in order to have overlapping forward and side waves. These effects are additive, so it works on top of the first two layers and can still be touched up by the last layer.
Parent Spaces
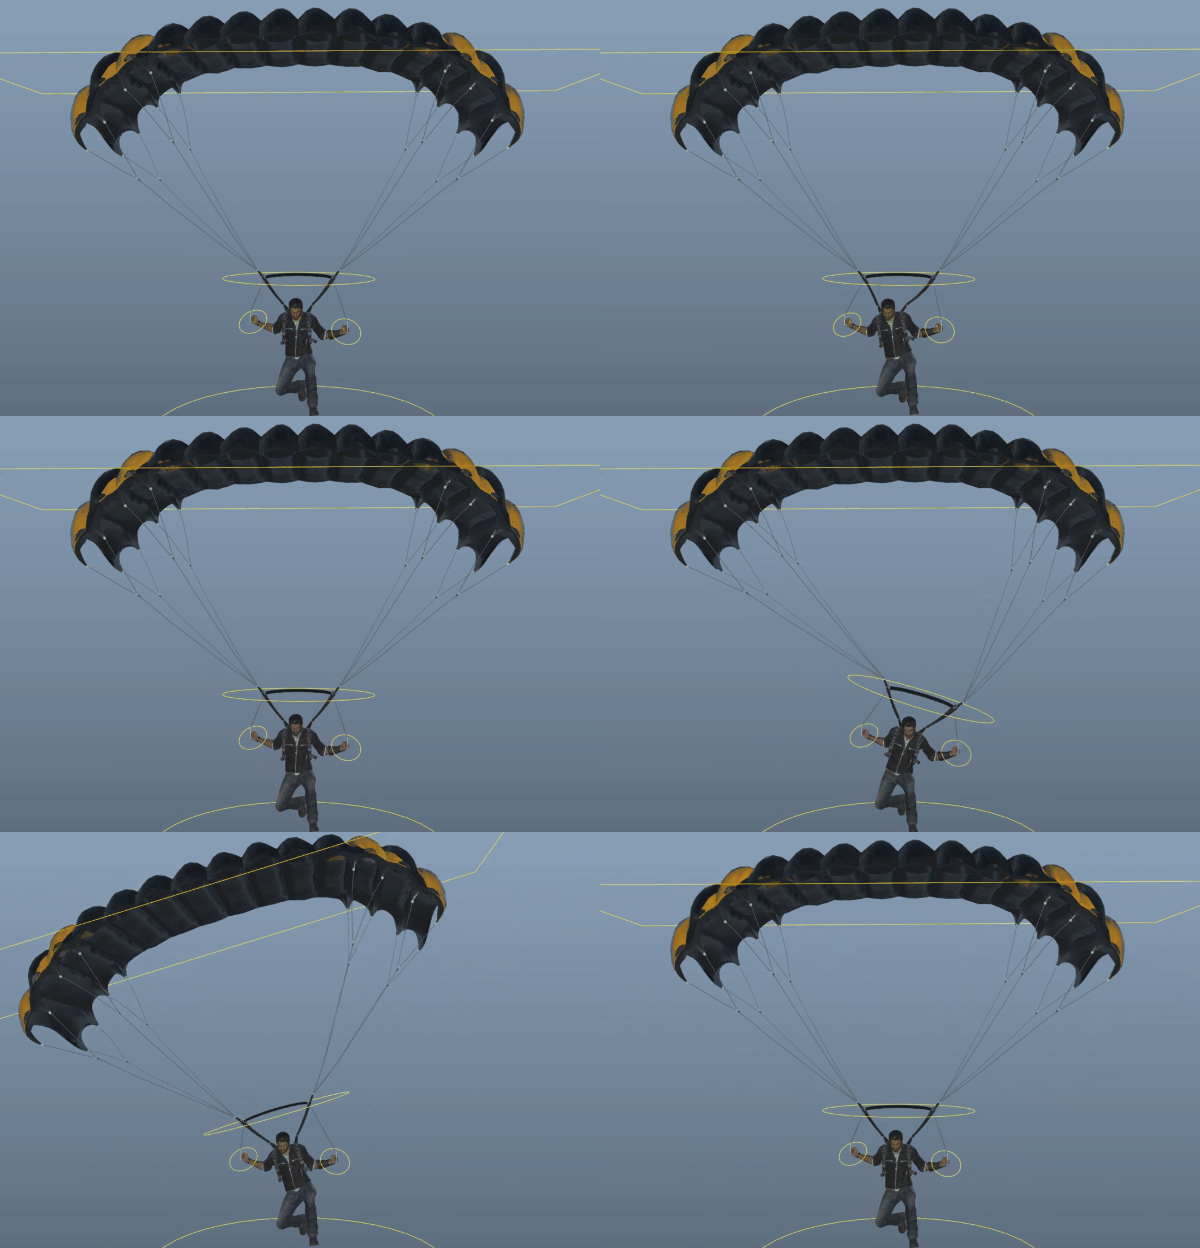 Later in development we realized the animator would need to be able to manipulate parts of the rig in a couple different spaces. I added a parent switch to the canopy so that it can be baked to either world or Rico’s hips space. Additionally spaces were added to the handle grips that would allow Rico to let go of them in certain animations.
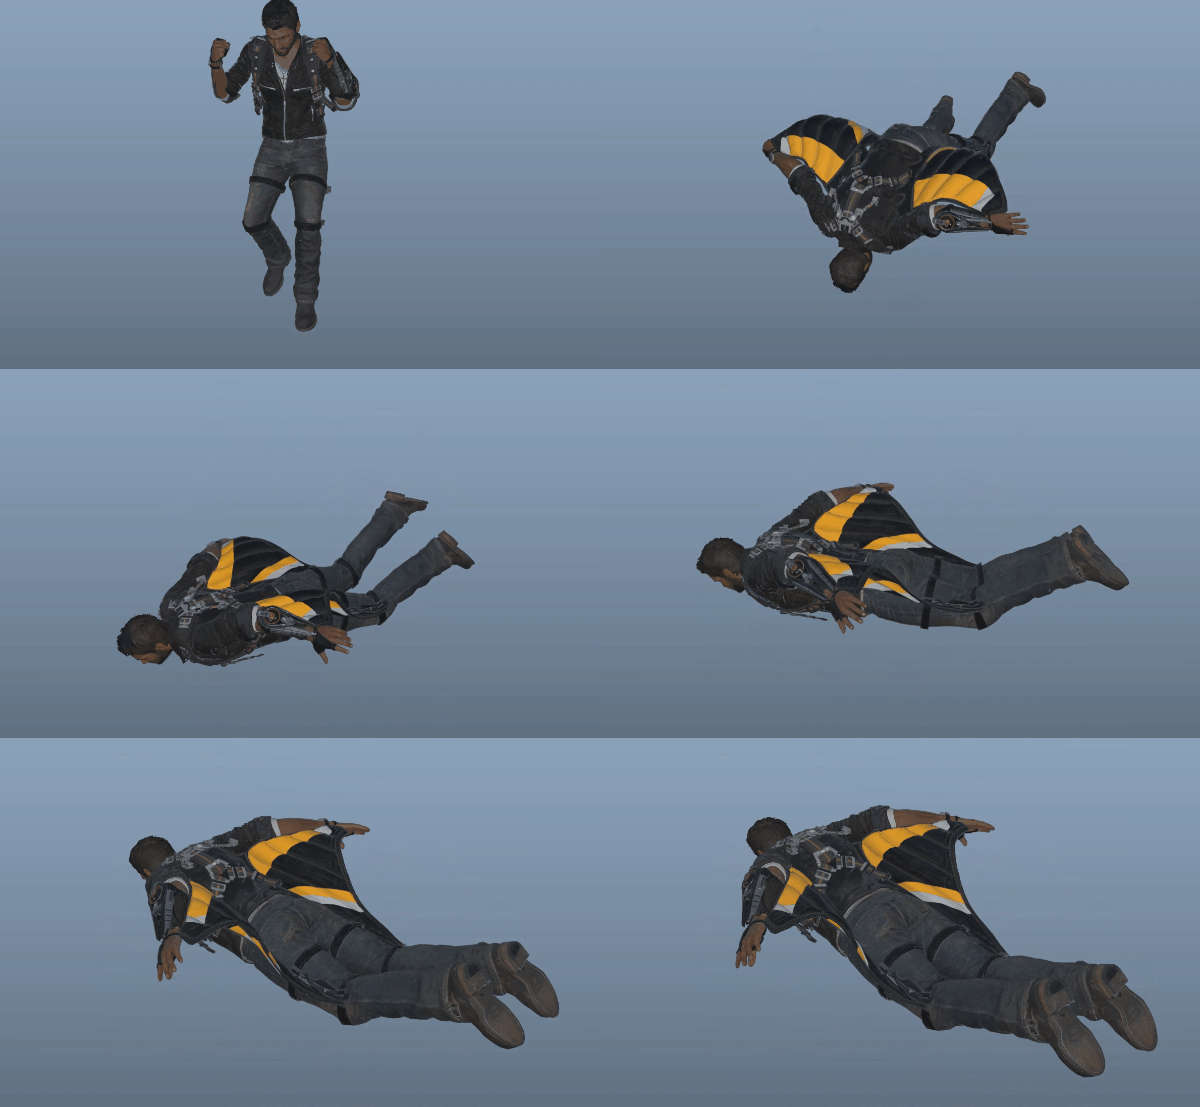
The Wingsuit
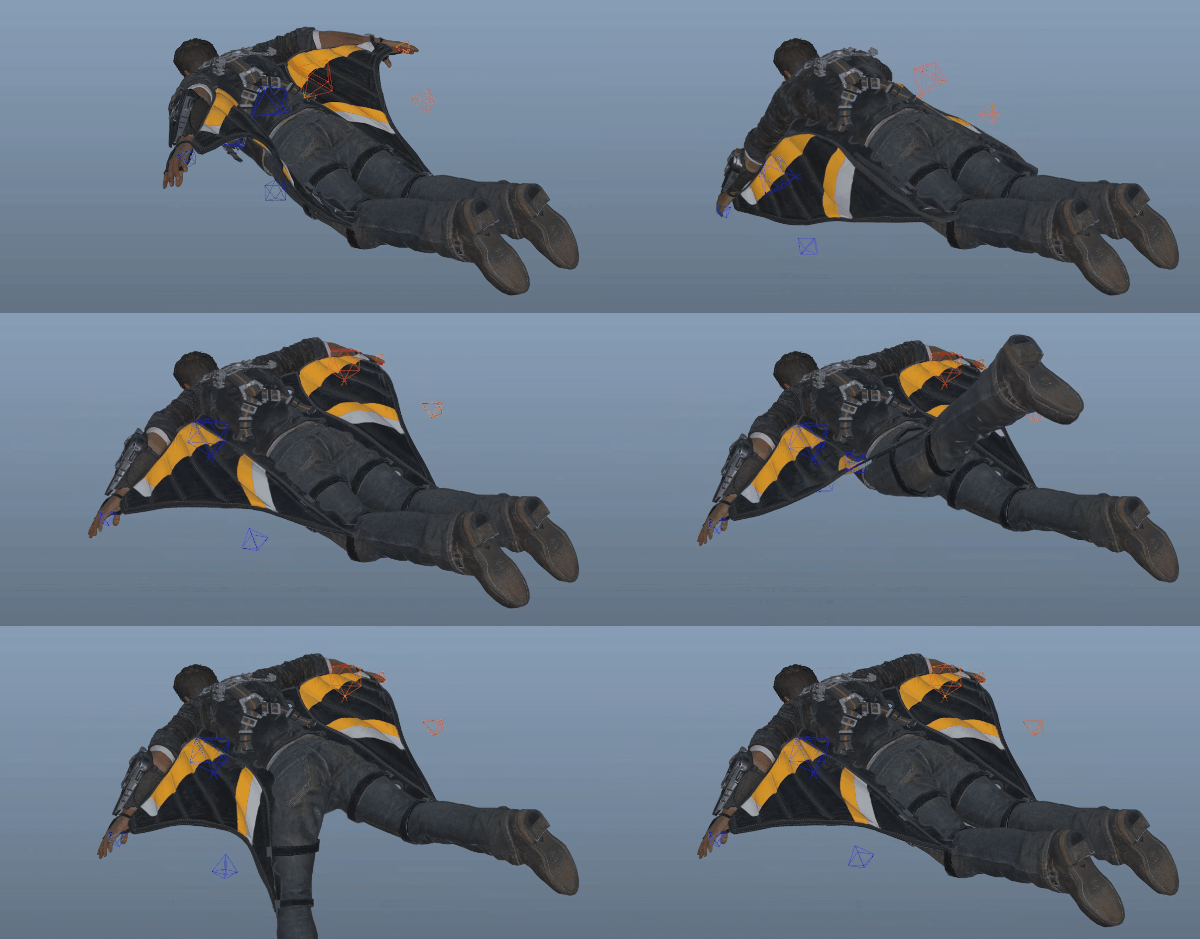 In comparison the wingsuit was more straight forward than the parachute. The main goal was for it to generally look good in any pose Rico is in, while still allowing for modifications by the animator.
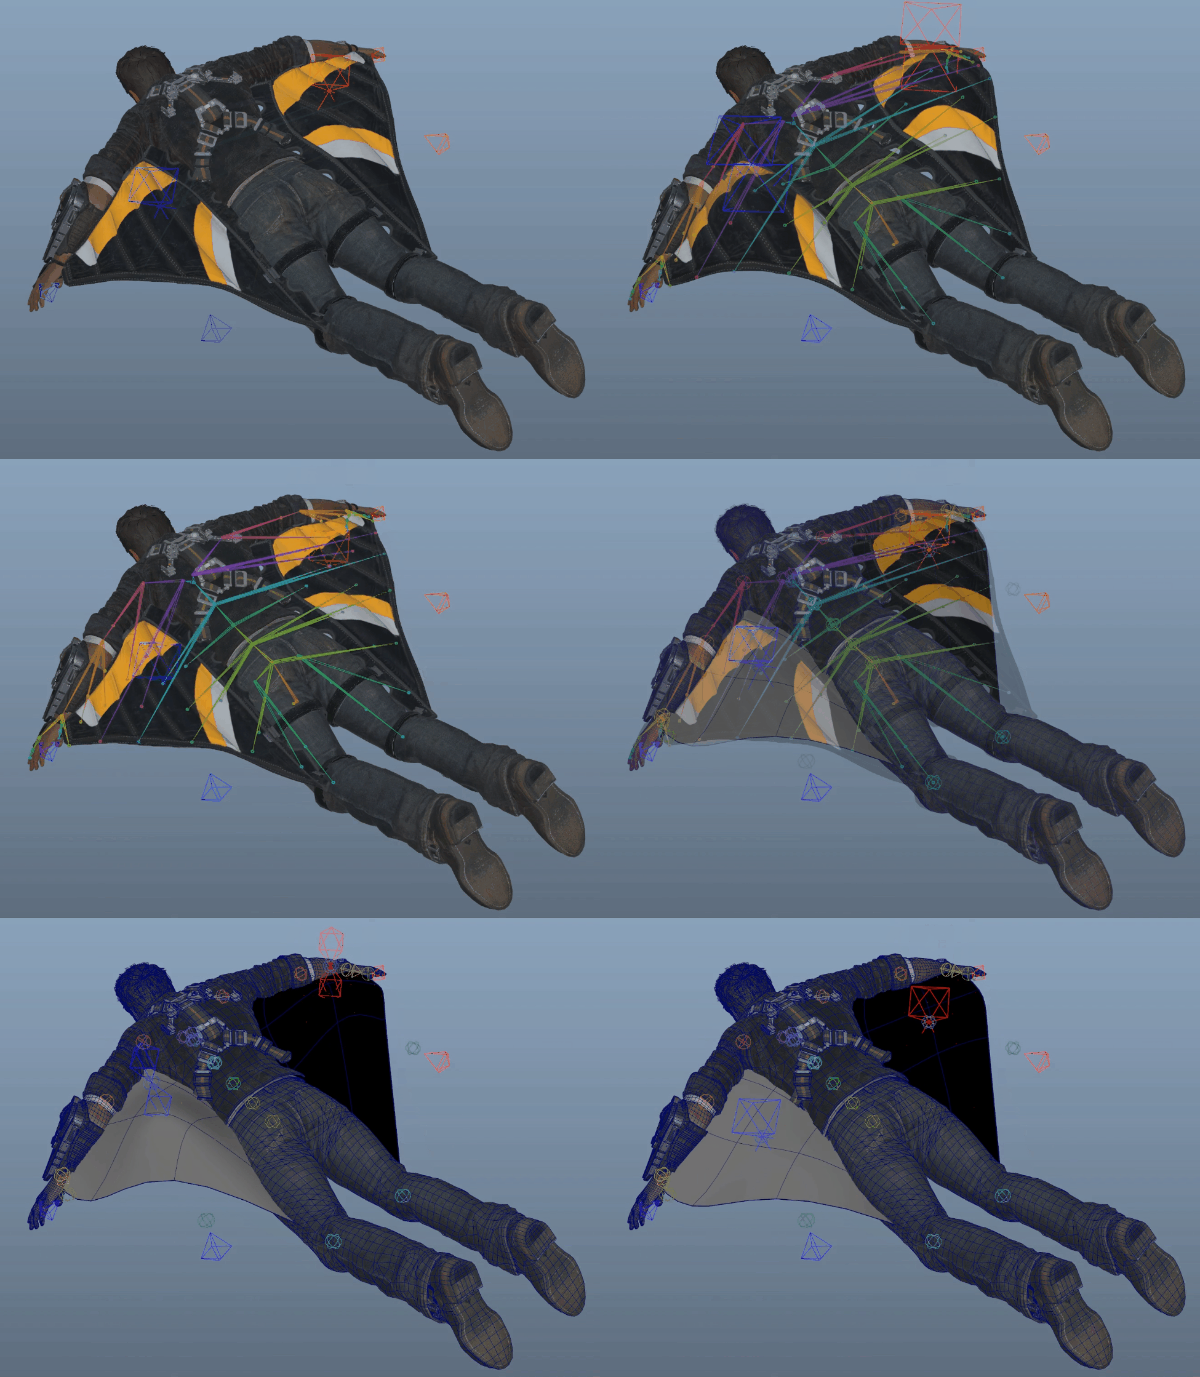 The wingsuit primarily involved two NURBS surface layers. The first was skinned to a skeleton that mimics Rico’s. Since the wingsuit is exported to engine separately from Rico, this skeleton serves as locators so it can be attached in game. This first surface then drives a second surface, which contains a couple extra joints that allowed for control of the overall shape of the rig.
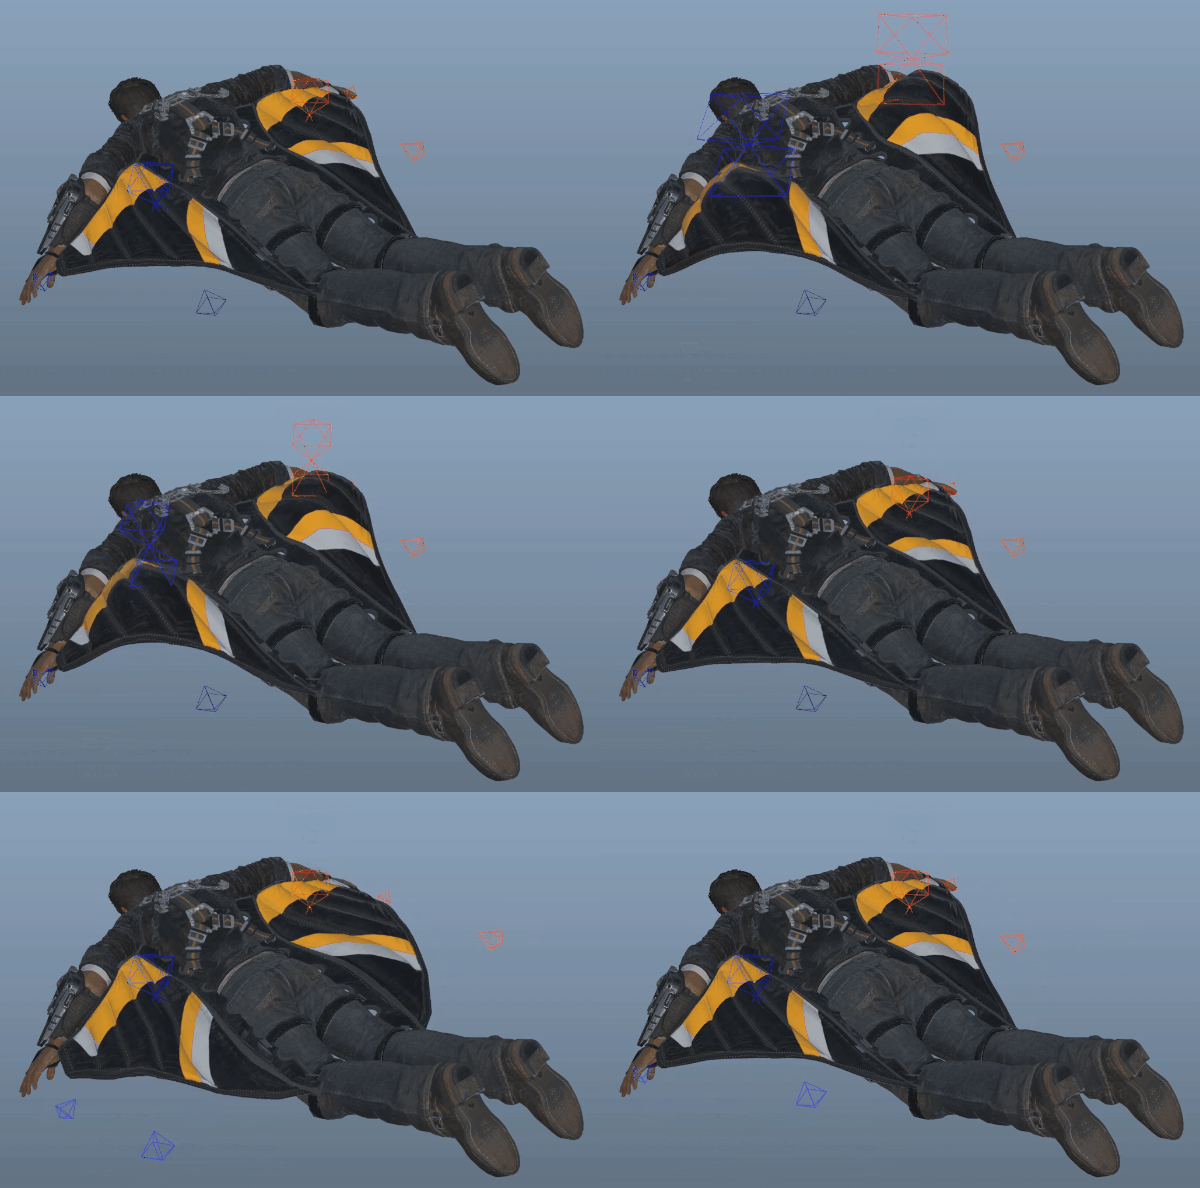 These shape controls included a billow control and two contour controls. The billow control drove the center of the wingsuit canvas. This way the animator can create the impression of drag. The scale of this control also could be used to define the billow falloff.
The two contour controls, however offset the edge of the canvas, allowing the animator to define the silhouette. Although the first surface layer does a decent job at maintaining a consistent shape, these controls gave the animator a quick way to define the stretch of the canvas.
Wind
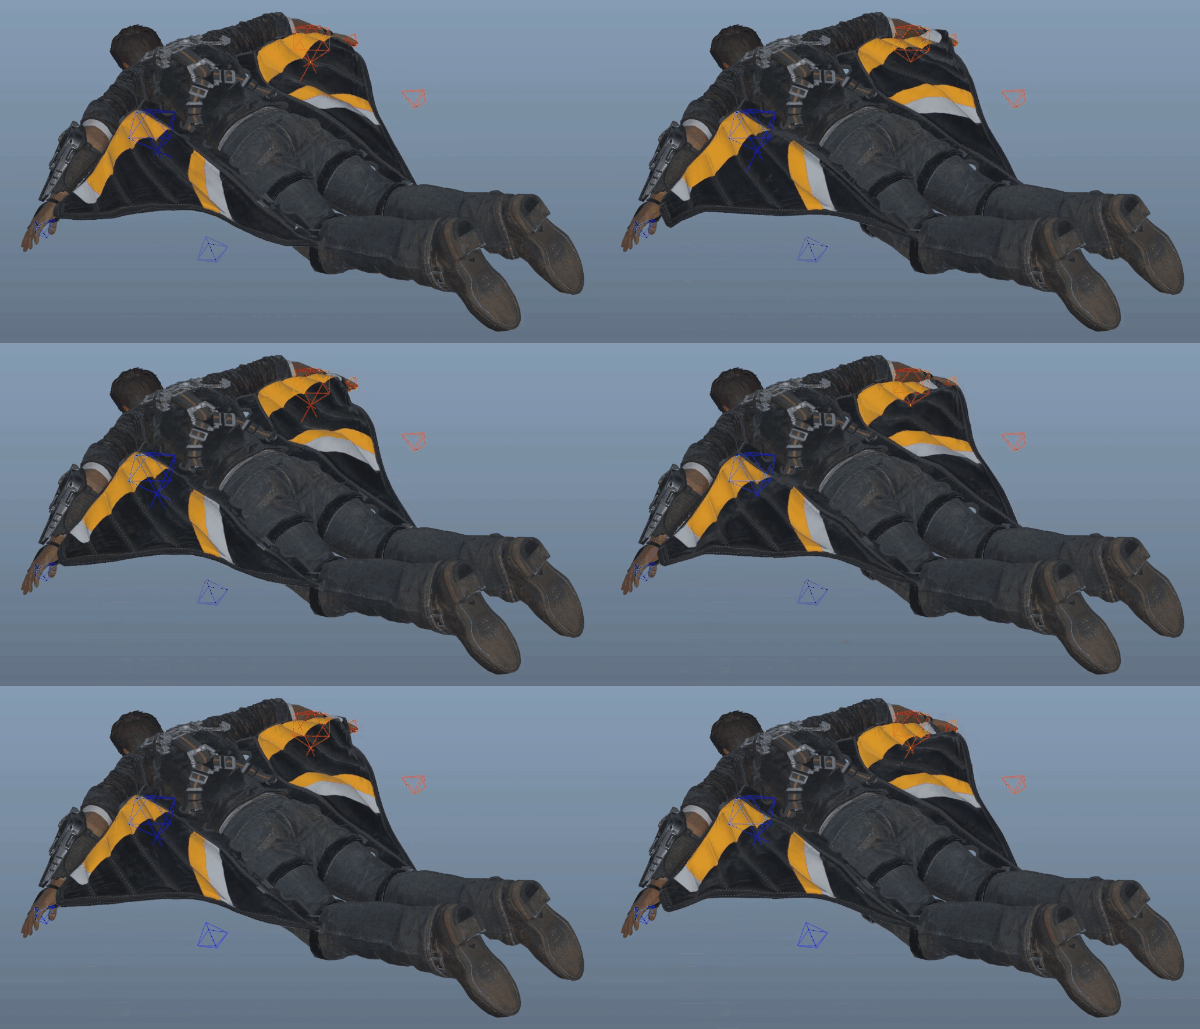 Wind controls was handled in a similar method to the parachute canopy, with two exceptions. The first was that instead of using two separate waves for forward and back, the wingsuit instead used an angle that allowed the animator to control the wind direction.
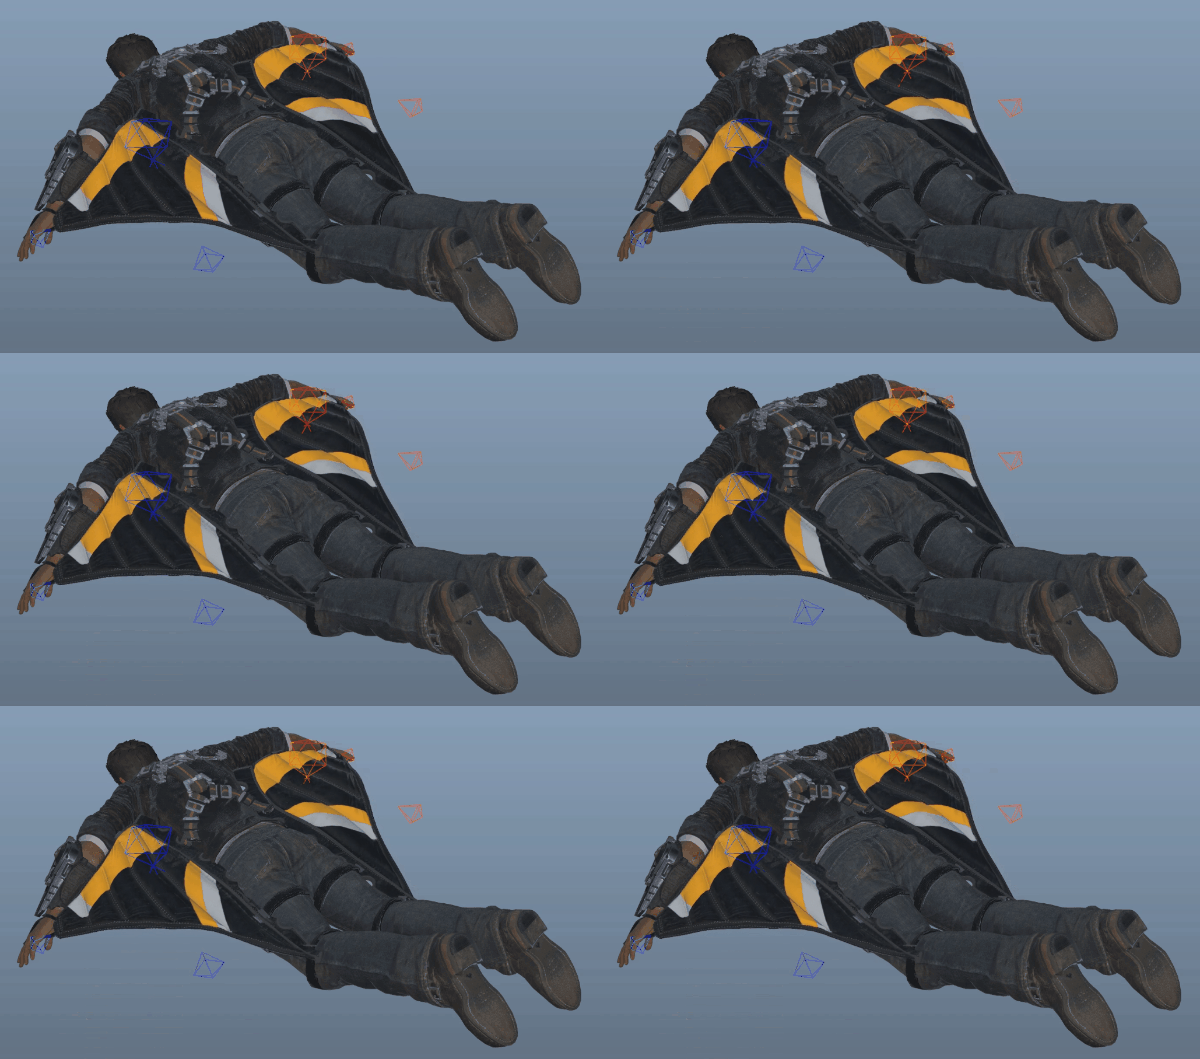 Secondly the rig also features a simple noise input. This was additively applied to the sine waves to create a bit more natural wind effect.
Grapple Wire
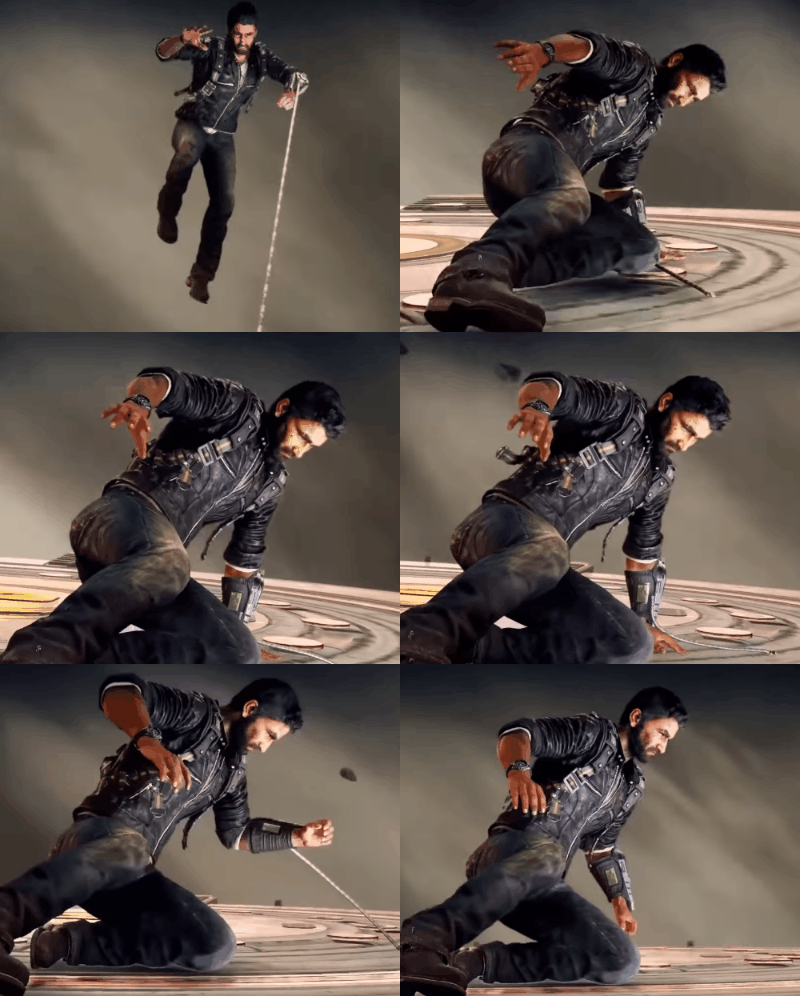
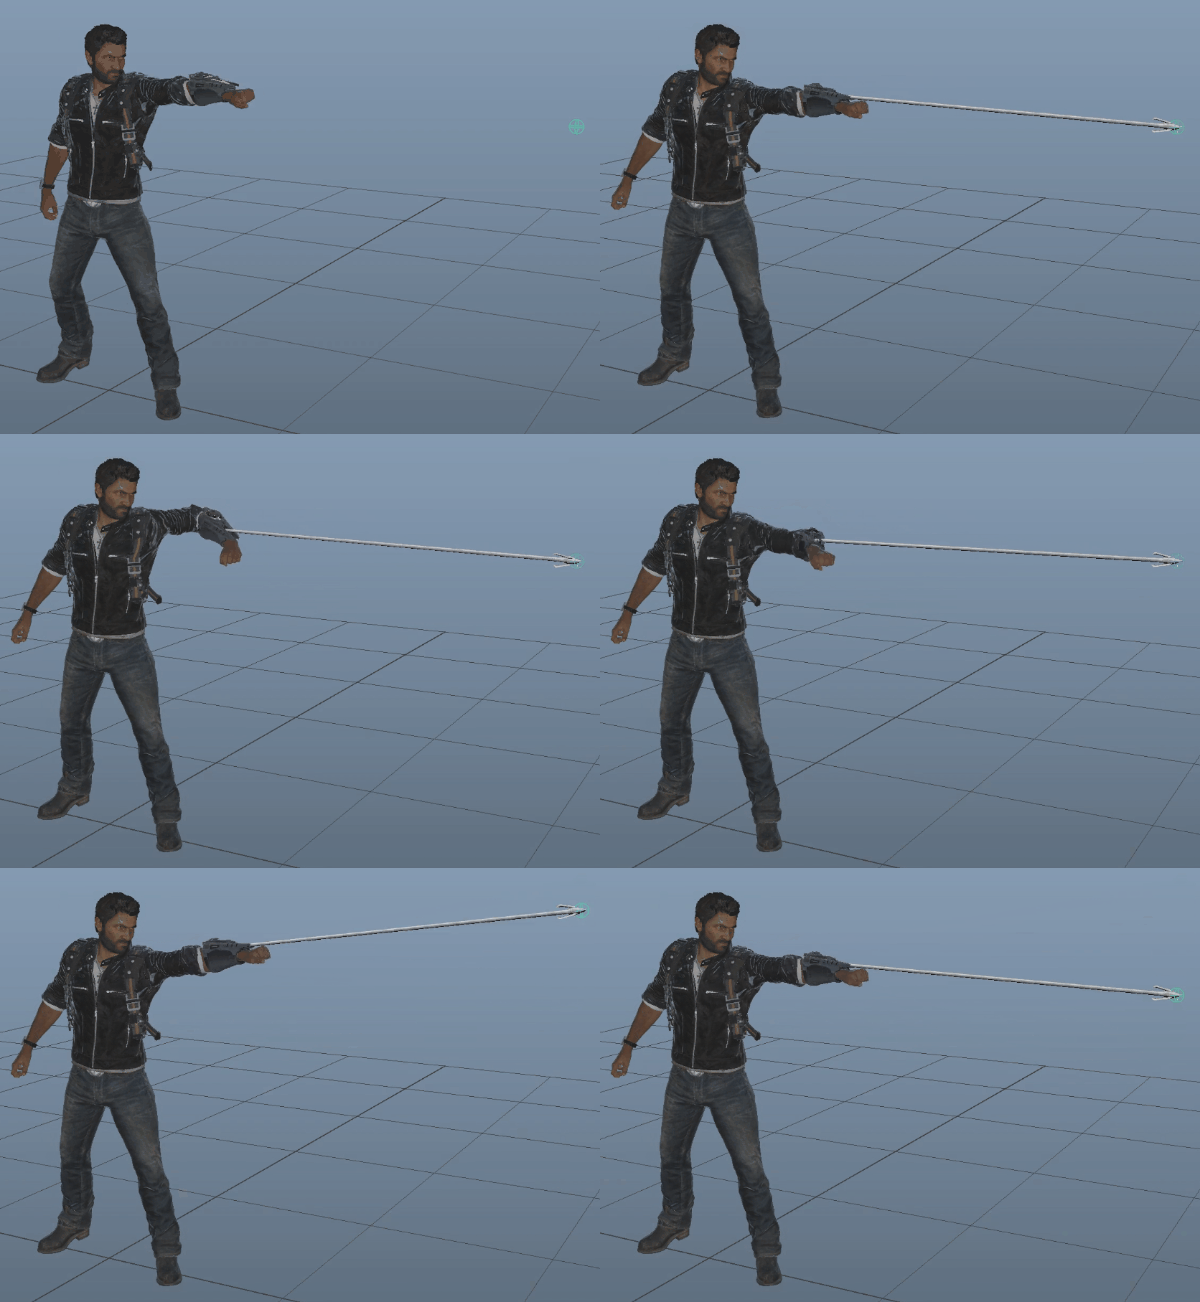 The last rig I worked on was the cinematic grapple wire. The big difference with this one was that it would only be used in pre-rendered cinematics, allowing us a higher than normal joint budget. The goal here was to create a rig that would emulate how the code-driven grapple wire works in game. This meant it would need to not only be able to launch and attach to objects, but also emulate the games iconic wire twists.
Auto Distance
Again this rig features layered controls. The first of these snaps the joint controls between the start and end points in a straight line similar to how the lines were handled on the parachute. However this time a distance blend parameter is included so that the animator can easily animate the hook reaching its target. A parent space was included here as well so that the end point can be in world or wrist space depending on if it should be attached or not.
Bezier Controls
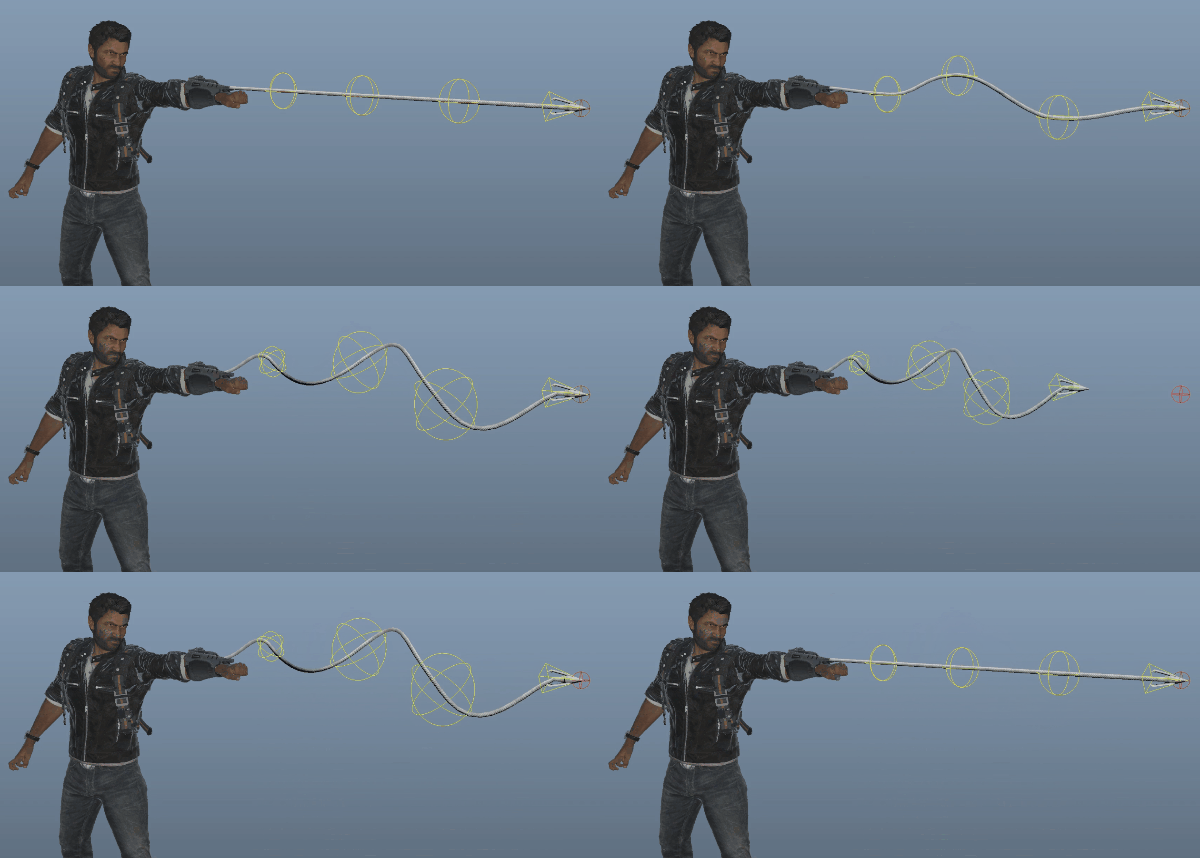 The next layer included controls emulating bezier curve controls. Under the hood is an actual bezier curve controlled with clusters. The rotation of each of these controls would define the tangents for each cv, and the scale defined the tangent length.
In order to preserve the shape of the curve, we had one joint for each edgeloop on the wire. This way we were able to avoid distortions and preserve the shape of the curve.
The curve here was also created procedurally in our build script, so the cv count could be controlled with a setting when building.
Scale
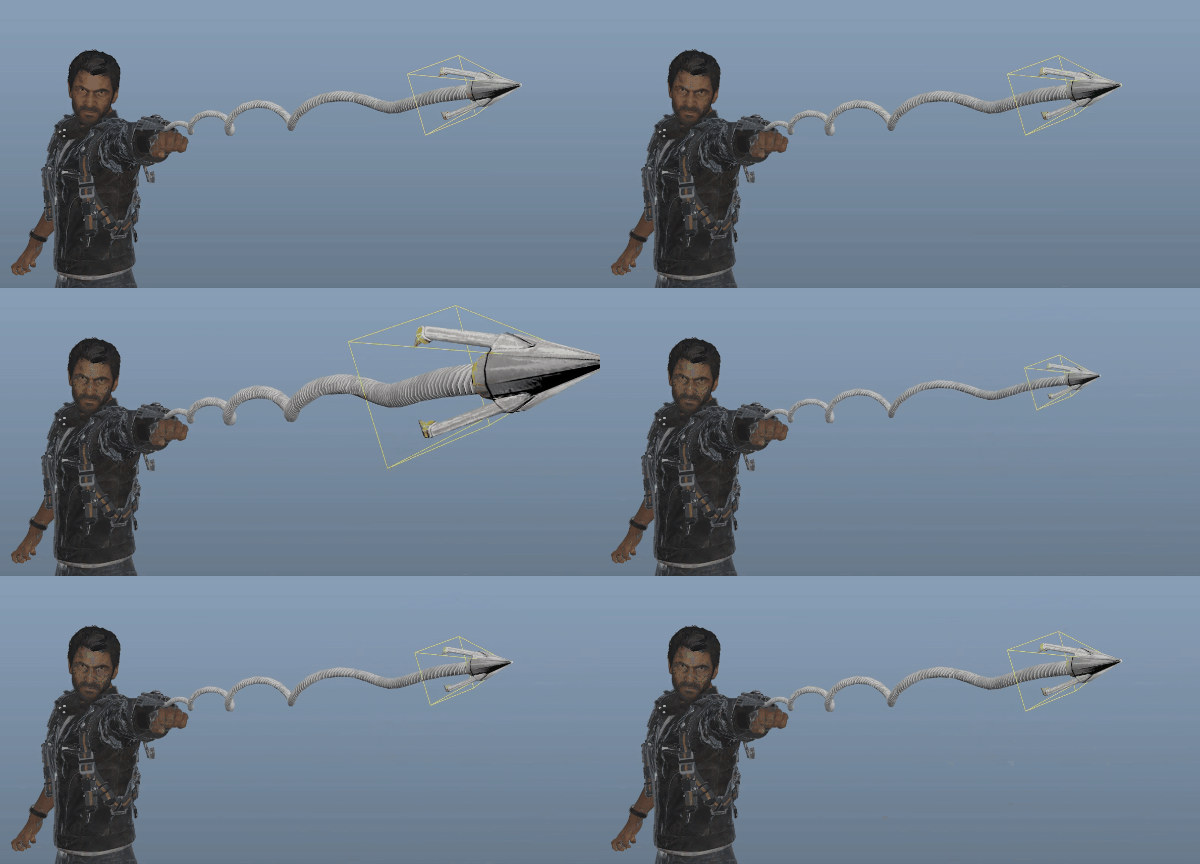 As the grapple is built solely for cinematics, we added some features that would allow the animator to take advantage of the “locked” camera. In this case I implemented joint scale with a controllable falloff. This way the animator can determine the size of the wire on screen, as well as use forced perspective to achieve an ideal composition.
Slack and Twist
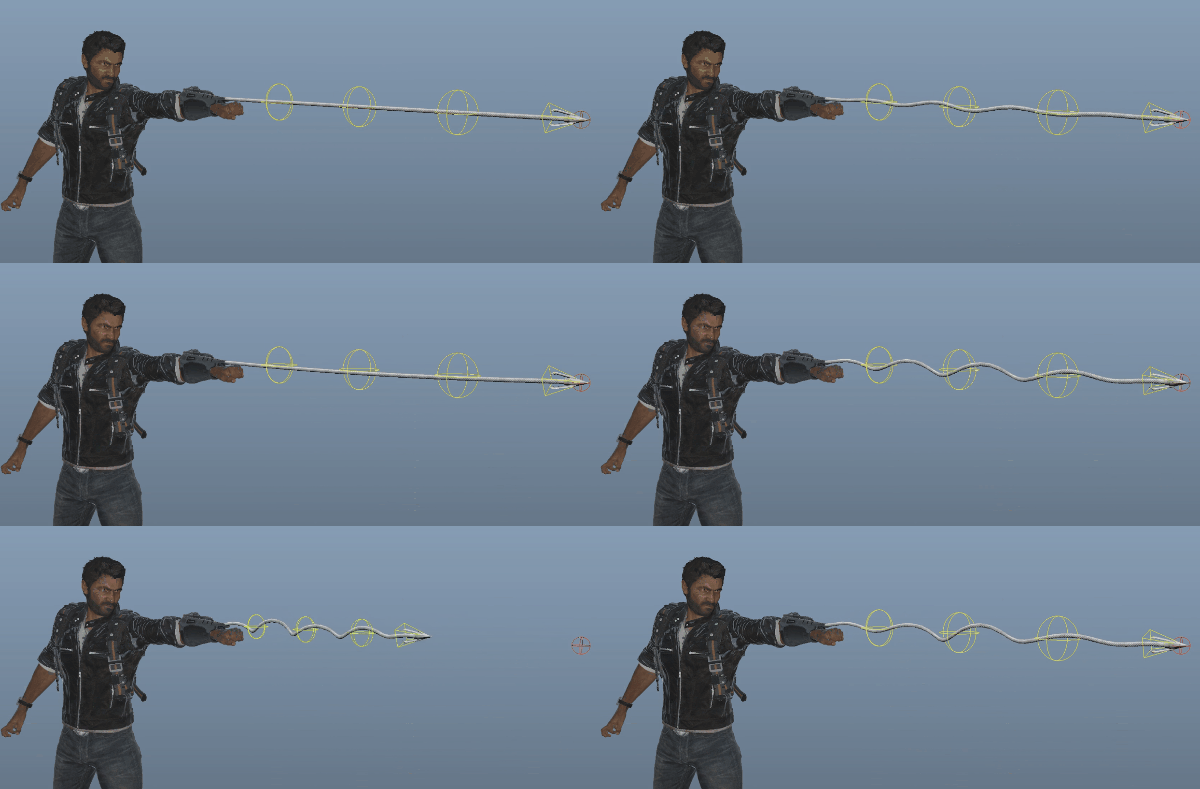 Of course when using a curve rather than a surface we needed a normal vector to handle the twist of each control. The solution here was to create one from a blend of the start and end rotations. When combined with a “slack” parameter that added a bend to the wire, we could create the iconic grapple spirals.
Waves
Lastly we also added sine wave controls to this rig, however this time we blended the effect so that the start and end points were never rotated.
This effect is also driven by the twist of the wire. So when twisted 360 we essentially create a sine wave from all angles and could avoid using two separated parameters as done with the parachute.
Support Tools
While the above techniques assisted the animator in dealing with the complexity of the rigs, several other support tools were devised to assist both myself and the animator.
Effect Baking
While live wind and noise controls allowed the animator to get instant feedback to settings changes, it prevented the opportunity to layer effects. Instead of building this feature into the rig, I ended up writing a quick script to bake wind down to the base controls on an animation layer.
This way the animator could mix various frequencies and amplitudes to create really naturally looking wind. Additionally it allowed wind settings to be saved to our pose library and added to different animations.
Rig Attachment
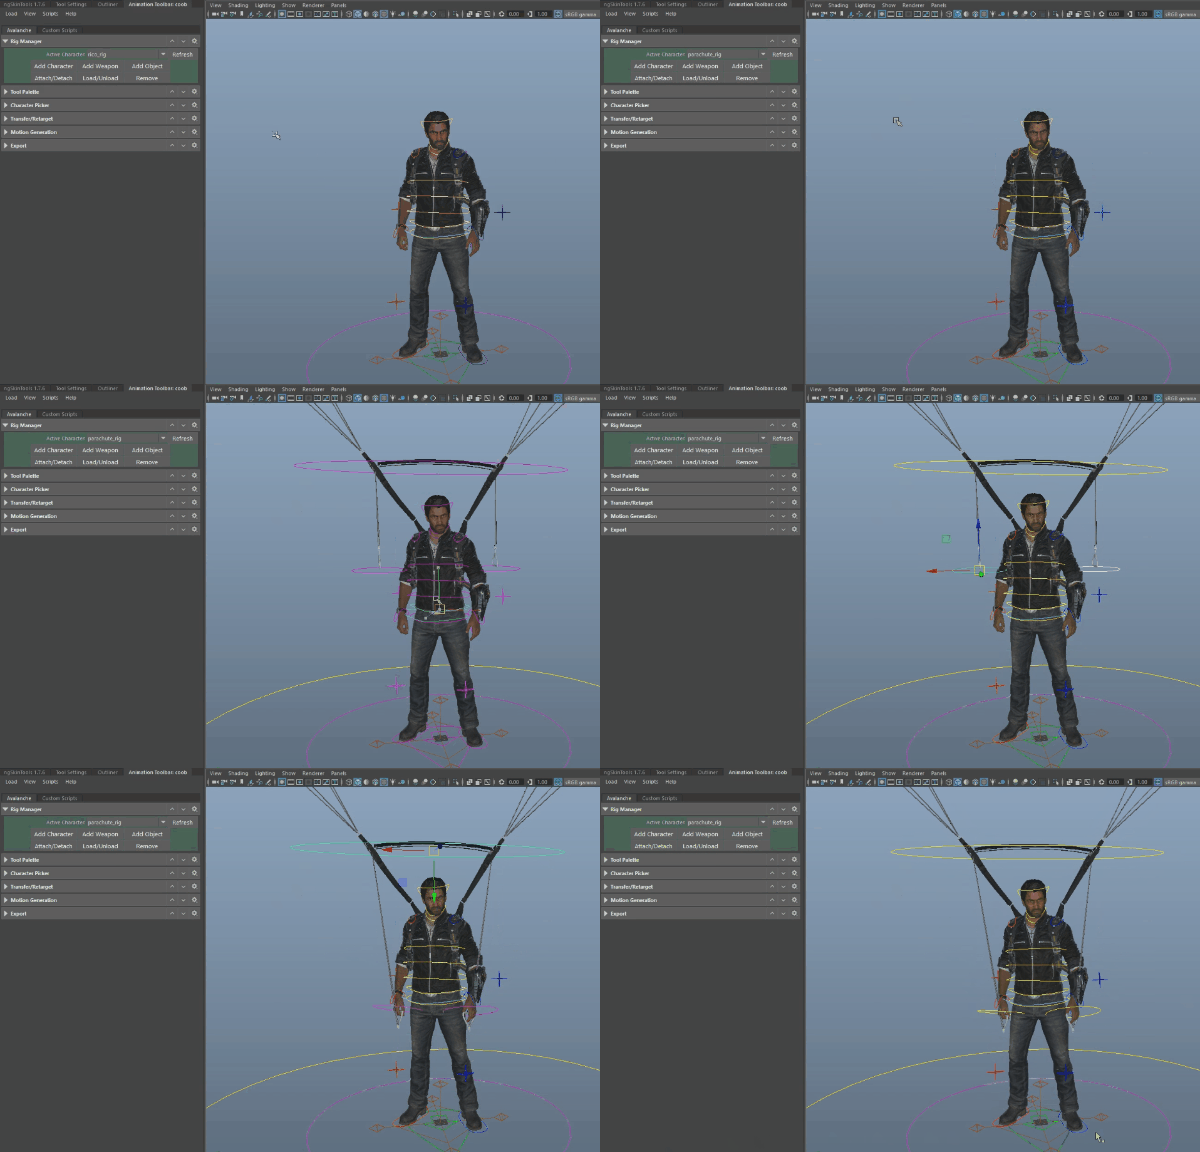 While both the rig and the prop were animated together in Maya, they would eventually be exported to the engine separately. That meant that however they were attached in Maya needed to perfectly emulate how they were attached live in game.
While simple props previously could be handled with constraints, these rigs needed a very specific setup. To solve this I implemented the idea of attachment instructions to our character importer. Essentially the instructions for how to attach a rig, was stored on the rig itself in the form of a string attribute.
This allowed us to separate the logic on how to attach the rig from the attachment system itself.
Surface and Curve Modules
All of these rigs required some form of NURBS control, either splines or surfaces. As the rigs were generated in code, I ended up writing a simple module for generating each of these. This not only allowed for easy generation in code, but also the freedom to experiment with cv and span counts when creating the rigs.
For the parachute this was handy for letting the animator determine the number of canopy controls needed. Instead of using a prebuilt surface, the canopy surface, joints, skinning and control curves were all generated through code.
Node Math Library
When using build scripts to create complex node systems, setting up the actual connection can become fair verbose when using the standard cmds or pymel. Because everything here was done with factory nodes, it can get exhausting to author these complex equations and often needlessly adds complexity.
To solve this I created a math library that allowed for the creation of dg nodes with bath like expressions. So instead of a line of maya code like this in pymel:
This system allowed me to focus entirely on the math and not be distracted by the boilerplate maya requires.
Final Results
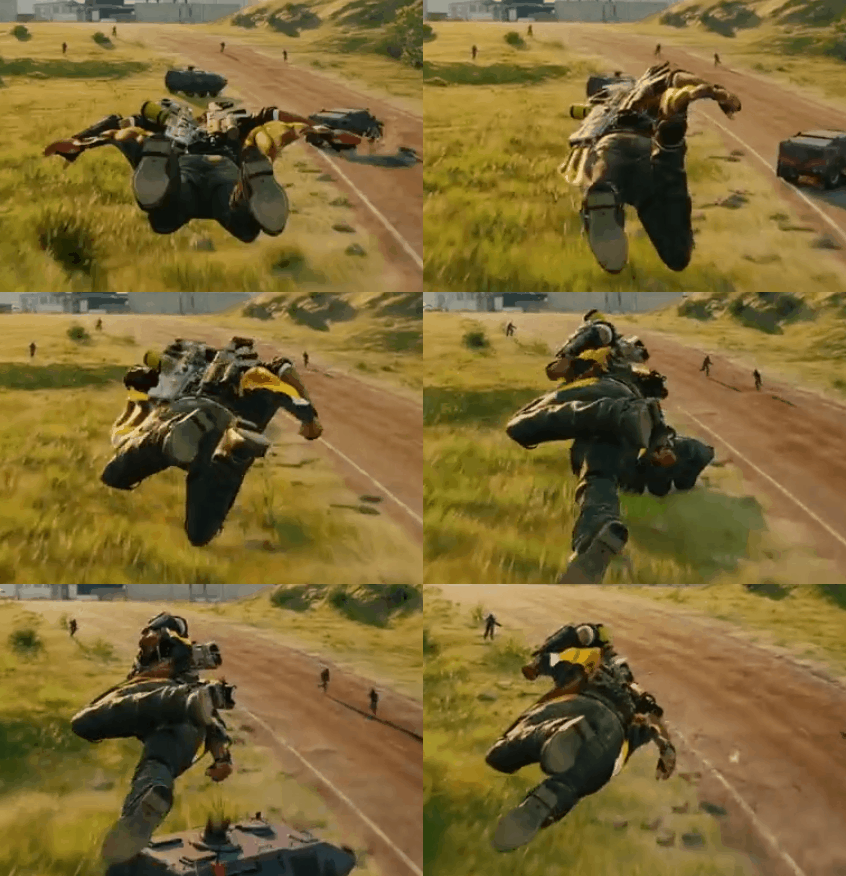
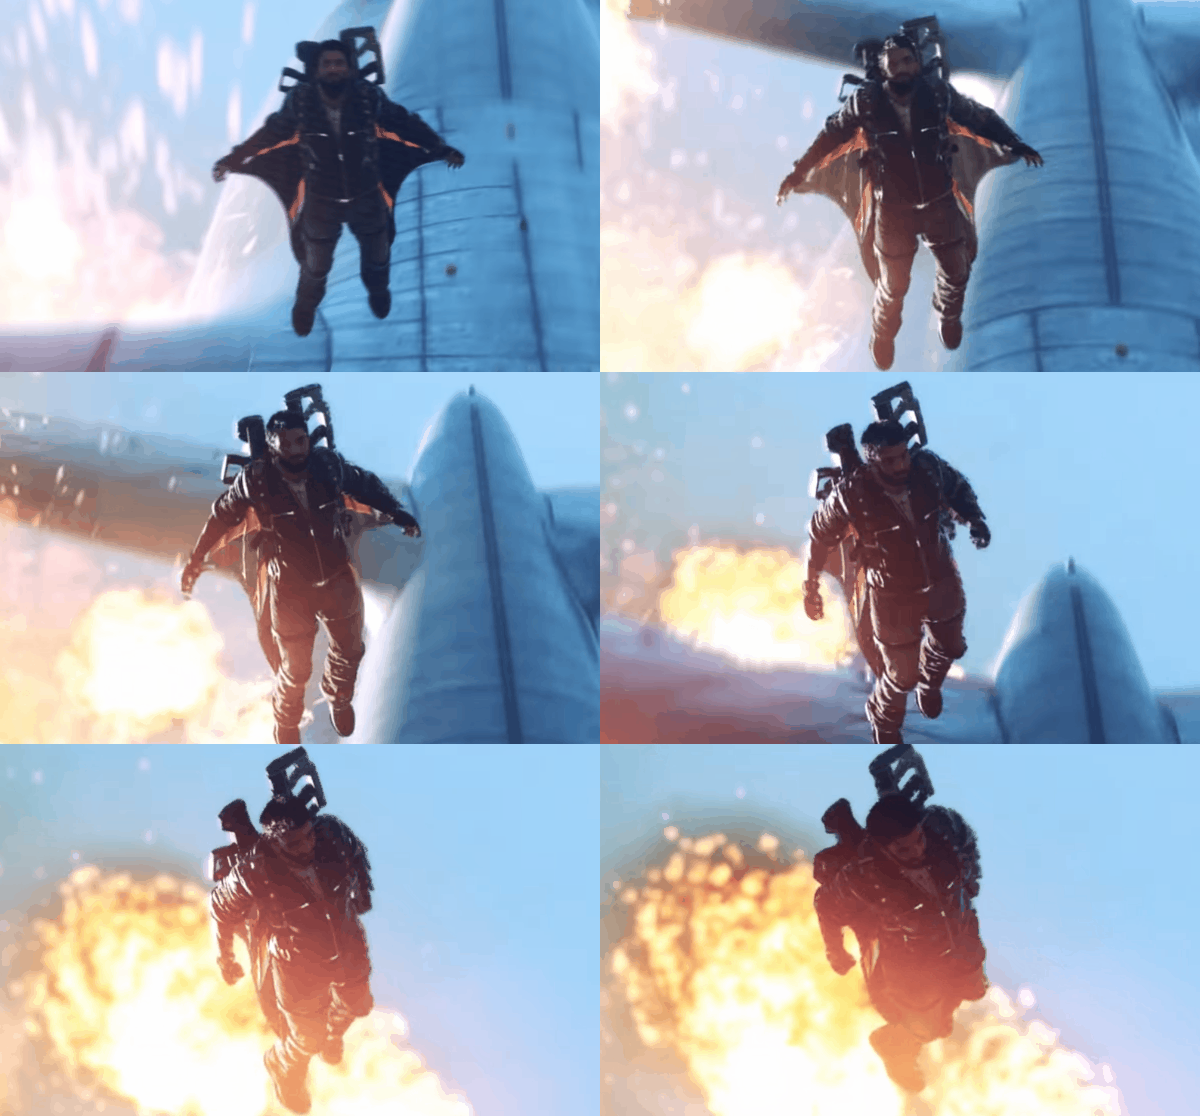
Finally, here are some examples of animations created using these rigs, both in Maya and in engine:
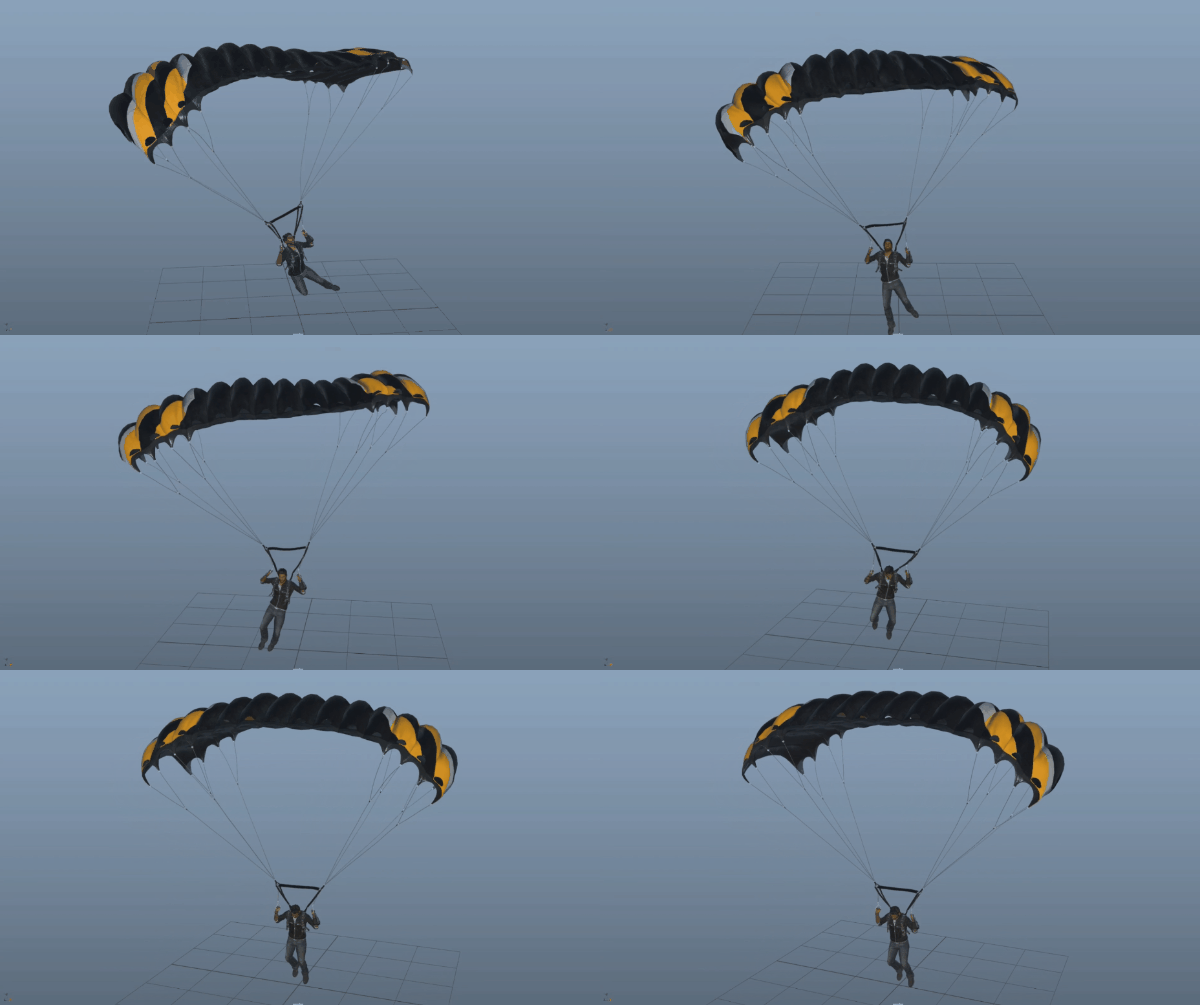
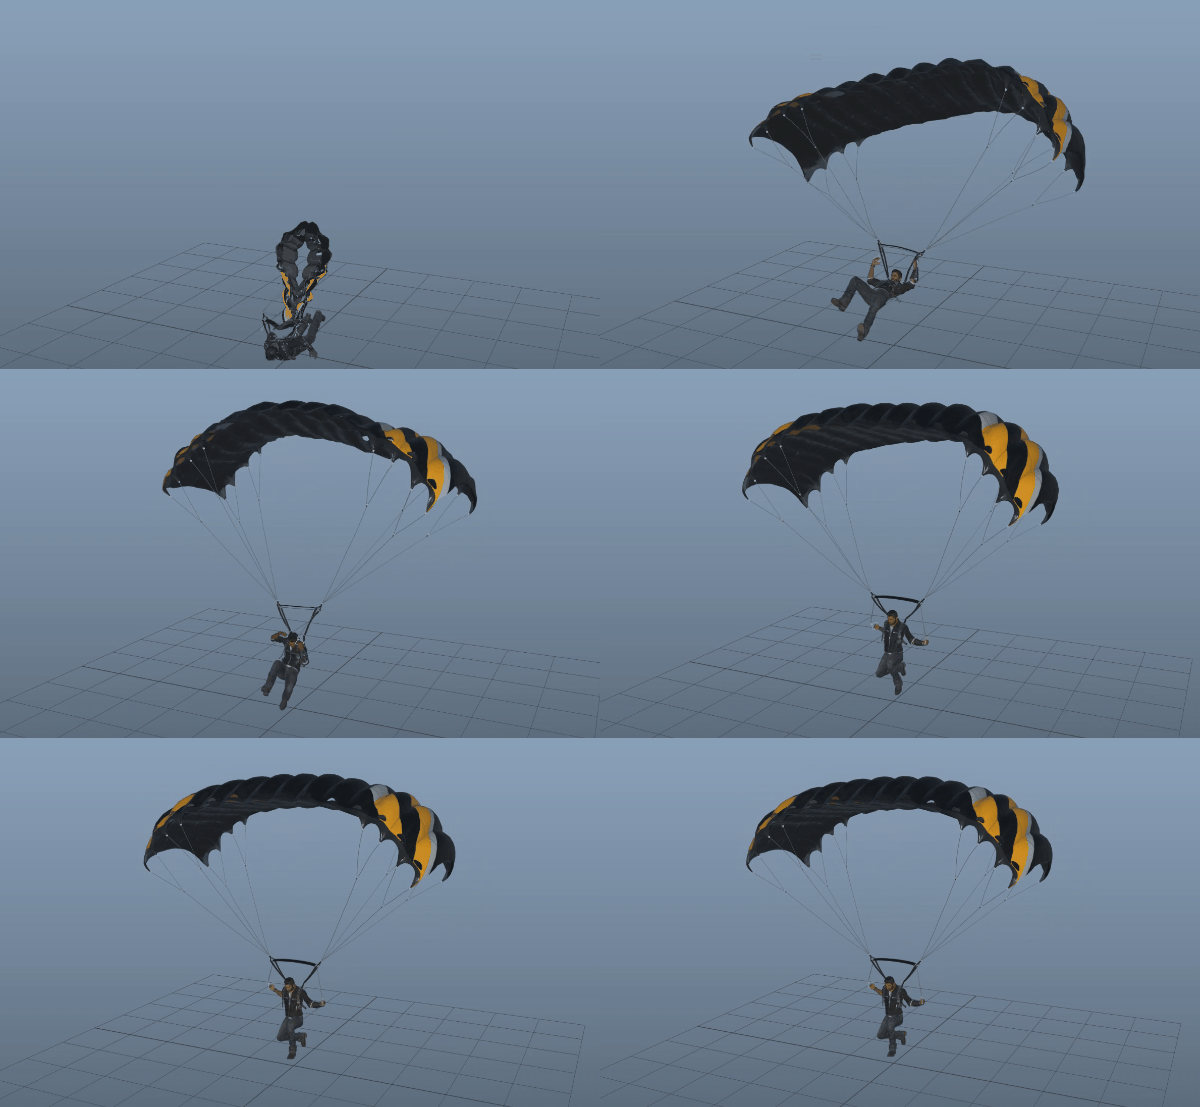

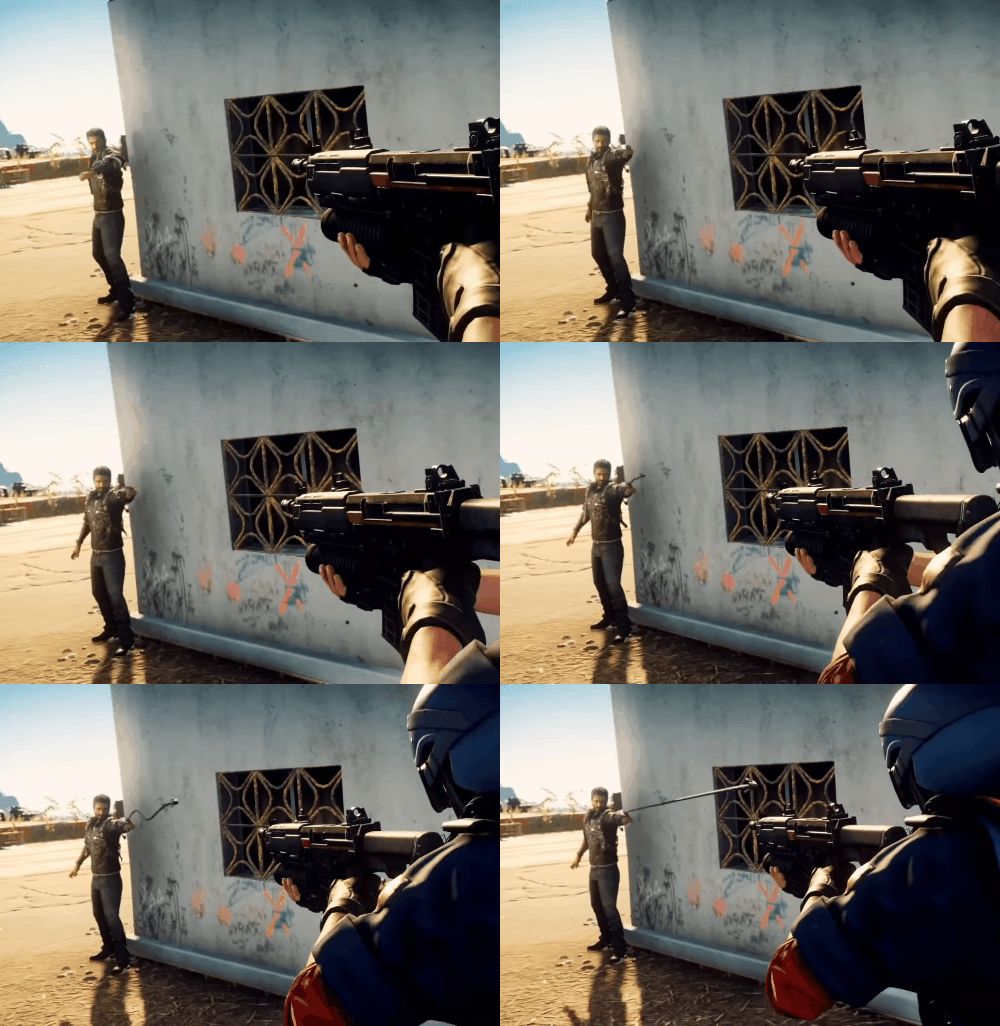 Animation by Ricky Wood.